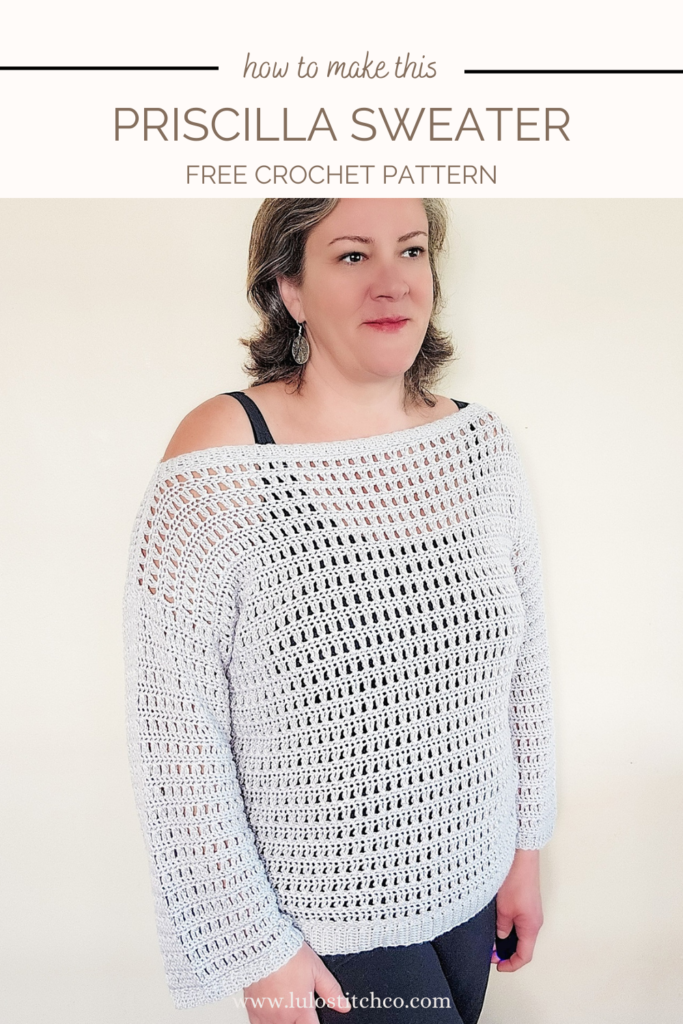
“PRISCILLA” OFF THE SHOULDER CROCHET SWEATER PATTERN
PURCHASE THE AD-FREE PDF OF THIS OFF THE SHOULDER CROCHET SWEATER PATTERN ON ETSY, RAVELRY OR LOVECRAFTS (or scroll down for the free pattern)
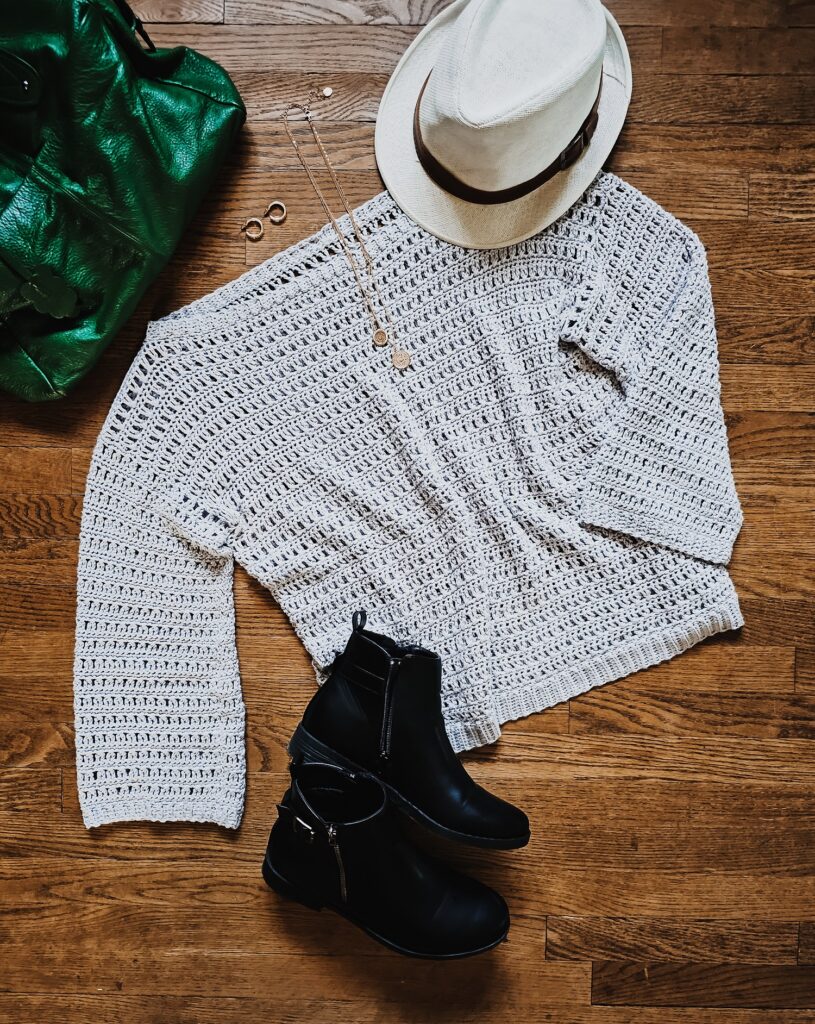
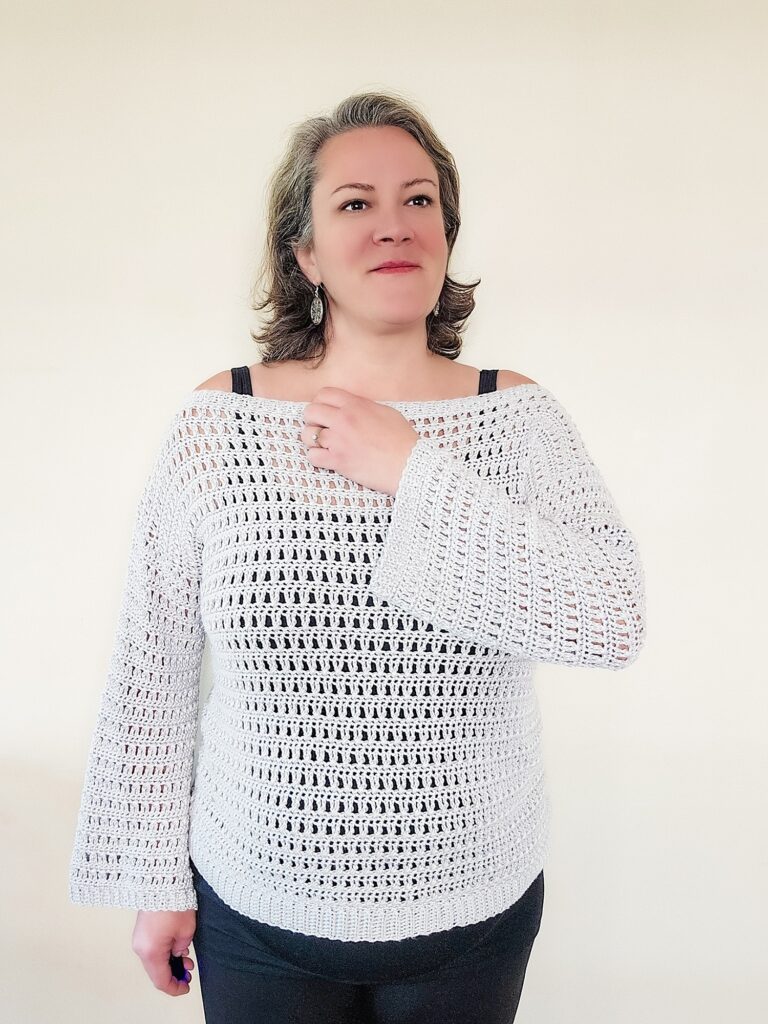
It may be cool and a little dreary these days, but that doesn’t mean we can’t have a gorgeous and airy off the shoulder crochet sweater hiding underneath our parkas and jackets! Shine on with the stylish Priscilla Sweater!
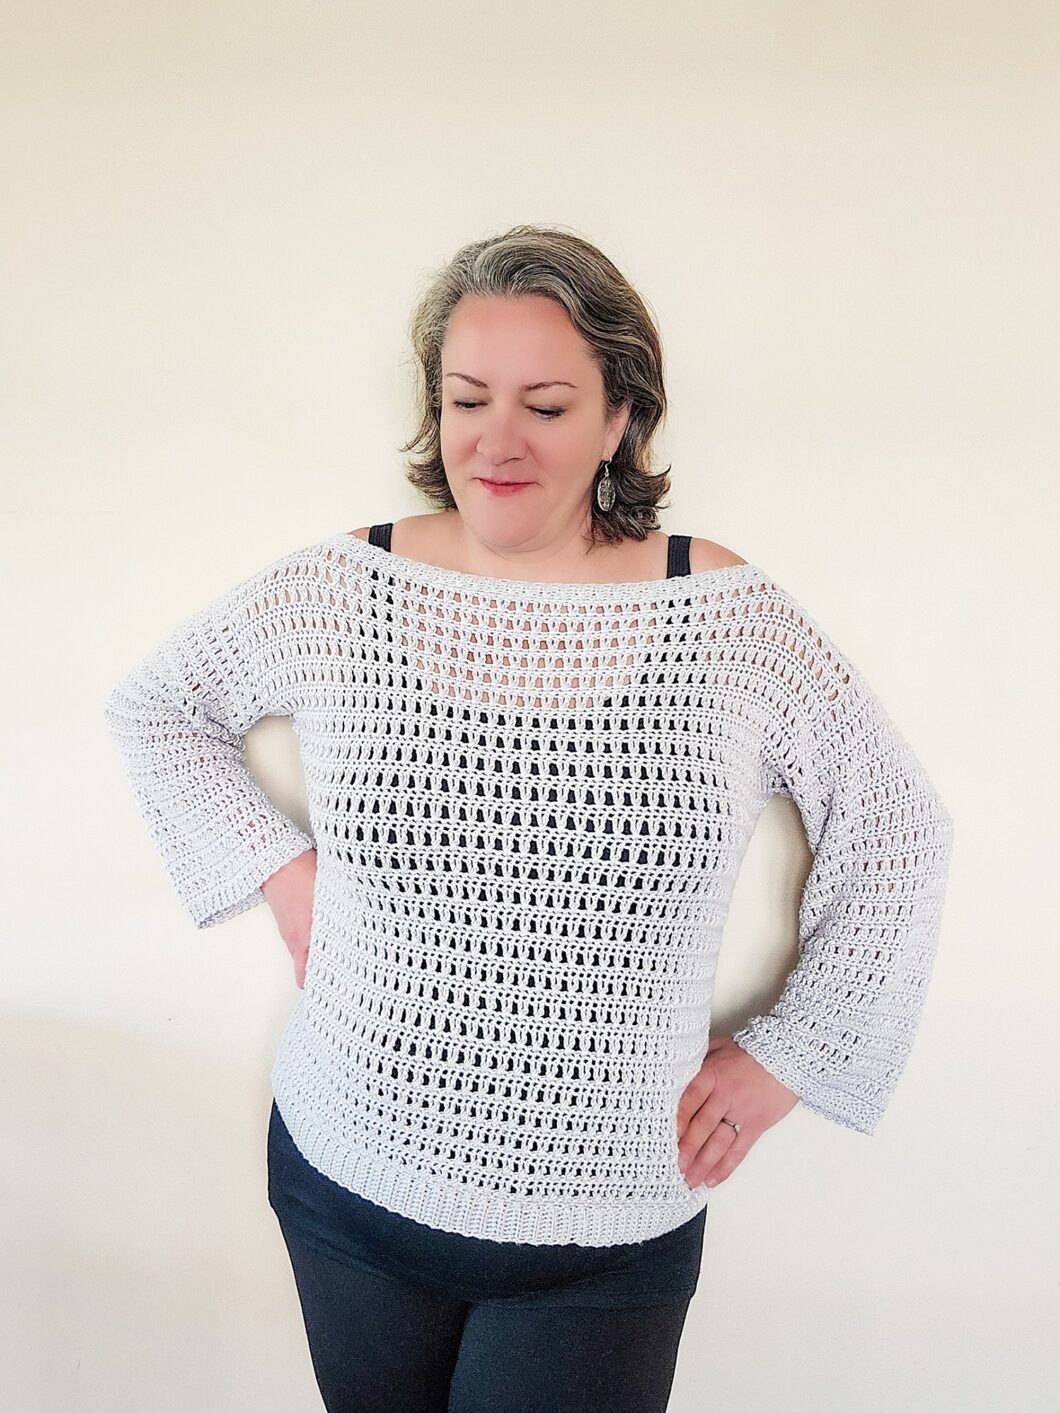
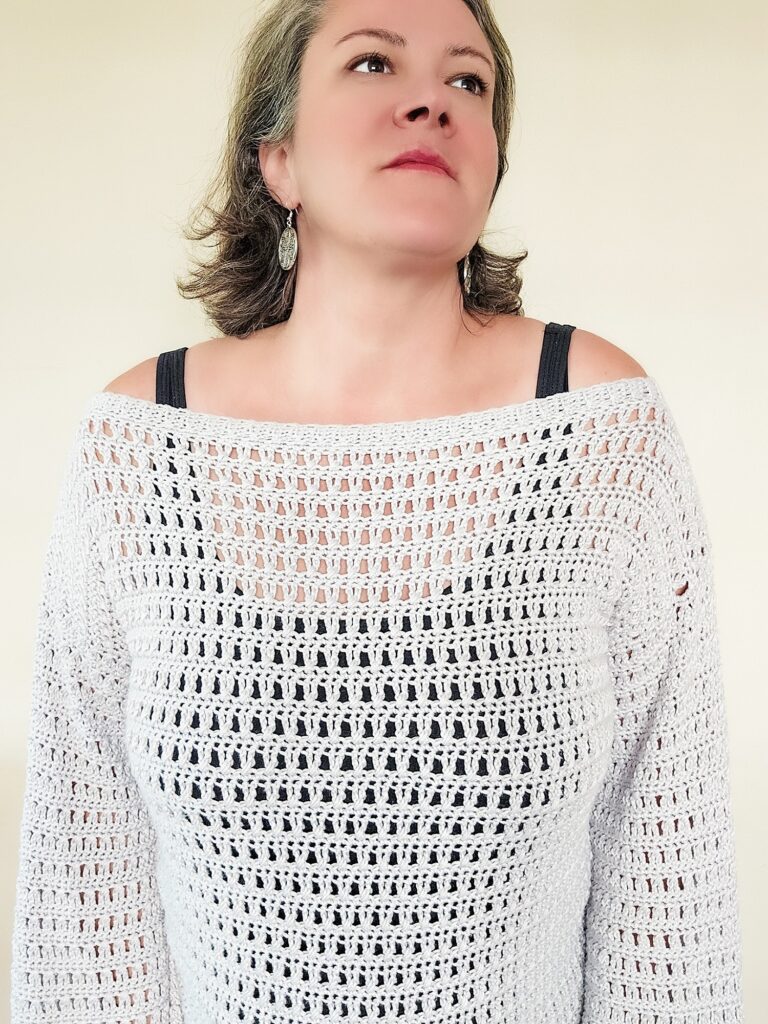
I just love how this piece is a lacey crochet sweater. It’s airy and flowy and can be worn as a really wide boatneck or off the shoulder. pair it with a white collared button down shirt for a more formal look.
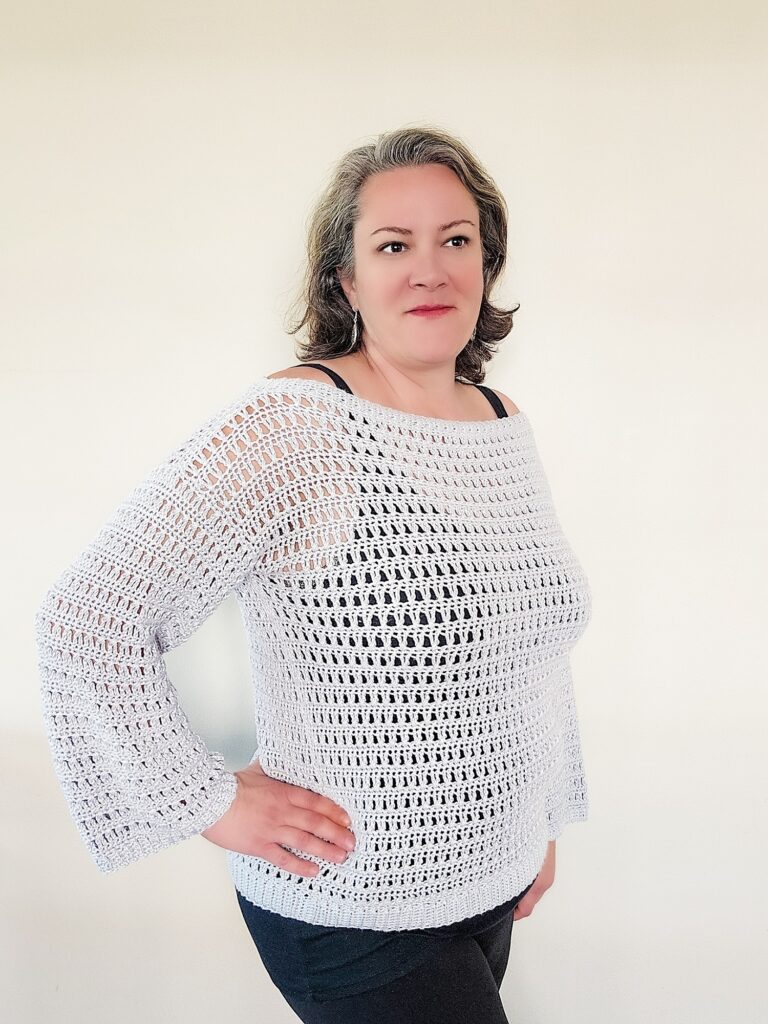
The simplicity of this piece also appeals to me – it’s a 2 row repeat of 2 simple stitches, the single crochet and the triple crochet cross-over. It creates that pretty peek-a-boo aspect while still keeping it structured and minimalist in terms of texture.
I used the Lion Brand Truboo in Silver and I must say, I absolutely love working with this yarn. It slides well on the fingers and hook but doesn’t split like some other yarns can. And the drape is out of this world. You could also use Premier’s Cotton Fair yarn as a substitute but any category 3 blended yarn will work.
If you’d like to customize your Priscilla Off The Shoulder Crochet Sweater, you can use the calculations in the pattern to add/subtract inches from the body or sleeve. You can also make this a regular pullover by closing up the neck hole a little more.
A little secret – I actually designed this lacey crochet sweater at the end of the summer and got sidetracked in publishing the pattern. But that doesn’t mean we can’t wear this pretty piece all year round! I’ve been wearing mine since I made it and it’s one of my all-time favorites. I hope you enjoy making and wearing it as much as I do!
For more sweaters, take a look at my Meadow Pullover, Robin Chunky Pullover or for the kids, the Kara Kid’s Sweater.
LET’S GET MAKING! Scroll down below for the FREE pattern for this off the shoulder crochet sweater OR you can PURCHASE the Ad-Free, printable version from my ETSY, RAVELRY OR LOVECRAFTS stores!
| SUPPLY LIST |
| 4mm hook Any Category 3 yarn (Used: Lion Brand Truboo in Silver) Approx yardage: XS: 950 Y / 868 M S: 1050 Y / 960 M, M: 1200 Y / 1097 M L: 1400 Y / 1280 M, XL: 1600 Y / 1463 M 2XL: 1800 Y / 1645 M, 3XL: 2000 Y / 1828 M, 4XL: 2250 Y / 2057 M, 5XL: 2500 Y / 2286 M Stitch Markers Scissors Tapestry Needle |
| STITCHES / ABBREVIATIONS |
| **All stitches are in North American terms** YO – yarn over CH – chain BB – back bump ST – stitch SC – single crochet TC – triple crochet TCCO – triple crochet cross-over |
| SIZE |
| XS through 5XL |
| FINISHED MEASUREMENTS |
| Sweater measured in circumference & length – 4” of negative ease although the sweater is meant to fit a bit loose XS: 29” C x 20” L S: 31” C x 20” L M: 37” C x 22” L L: 41” C x 22” L XL: 45” C x 22” L 2XL: 49” C x 24” L 3XL: 53” C x 24” L 4XL: 57” C x 26” L 5XL: 61” C x 26” L |
| GAUGE |
| 16 stitches x 9.25 rows = 4” x 4 — [4 ST/inch // 2.3125 R/inch] |
| DIFFICULTY LEVEL |
| Intermediate |
| PATTERN AND SIZING NOTES |
| – For this off the shoulder crochet sweater you must have knowledge of: working in the BB of the foundation chain, slip stitch, single crochet, single crochet in the back loop (for cuff/hem/neck ribbing) perpendicular to your work, triple crochet, working crossed-over stitches and seaming. – The stitch used for this airy sweater is the triple crochet cross-over (alternated with a row of SC on the right side//the TCCO rows will be done on the wrong side), which means you skip a stitch, do a triple crochet then cross over to the skipped stitch and do another triple crochet. – Keep in mind, if customizing, that each row of both the sweater body and the sleeves, must be an ODD number. – If you want to customize the length or width of the sweater, the calculations are 4 ST’s per inch of width and 2.3125 rows per inch of length. You can customize the neck circumference to make it a regular pullover instead of an off the shoulder sweater, if you like, just seam in further toward the neckhole. – The CH at the beginning of each row does NOT counted in our row stitch count. – The stitch count is given in parentheses ( ) at the end of each row. – All terms are in US / North American terms. |
INSTRUCTIONS:
**Instructions for the Priscilla Off The Shoulder Crochet Sweater are given in XS (S, M, L, XL, 2XL, 3XL, 4XL, 5XL)**
“Priscilla” Off The Shoulder Crochet Sweater:
Make 2 Matching Panels:
CH 59 {63, 75, 83, 91, 99, 107, 115, 123} + 1 to turn
Row 1: Starting in the first CH from the hook, SC in each ST across, CH 4 & turn (59/75/83/91/99/107/115/123)
Row 2: Skipping the 1st ST from the hook, TC in the 2nd ST, then cross over to TC again in the 1st ST [this is called triple crochet cross-over and will be referred to as TCCO henceforth] – Continue TCCO across the row, ending on a TC in the last ST, CH 1 & turn (59/75/83/91/99/107/115/123)
Row 3: SC in each ST across, CH 4 & turn (59/75/83/91/99/107/115/123)
Row 4: TCCO across the row, CH 1 & turn (59/75/83/91/99/107/115/123)
Row 5 to 47 (47, 51, 51, 51, 55, 55, 61, 61): Repeat rows 3 & 4 to the appropriate row number (you should be ending on a row of SC), YO pull through and tie off and make a 2nd identical panel.
Seam the Shoulders:
– Place your 2 matching panels right side in and seam together the shoulders – for the off the shoulder look, I suggest seaming in the following number of stitches relevant to the size: 10 (10, 12, 14, 14, 16, 16, 18, 18) or you can customize the neck width to your liking.
Making the Sleeves:
– We will be working directly off the side of the 2 shoulder seamed panels to make our sleeves.
– Remember that we are working on to the side of alternating TC rows and SC rows, so each TC row will have 3 ST’s placed in it and each SC row will have 1 ST placed in it.
– On each side of the panels, find your center stitch at the shoulder seam and count out the same number of stitches on either side of the center relevant to the size and mark these: 24 (24, 28 28, 32, 32, 36, 36, 36)
– Join your yarn in the 1st marked ST.
Row 1: CH 1 and in the same ST as your join, SC, then SC in each ST across remembering that the TC rows require 3 ST’s and the SC rows require 1 ST. This doesn’t have to be exact, but so long as you have the correct ODD number of stitches required for your size choice, all will be well. CH 4 & turn (49/49/57/57/65/65/73/73/73)
Row 2: TCCO across the row, CH 1 & turn (49/49/57/57/65/65/73/73/73)
Row 3: SC in each ST across, CH 4 & turn (49/49/57/57/65/65/73/73/73)
Row 4: TCCO across the row, CH 1 & turn (49/49/57/57/65/65/73/73/73)
Row 5 to 33 (35, 35, 37, 37, 37, 39, 39, 39): Repeat rows 3 & 4 to the appropriate row number (you should be ending on a row of SC) – DO NOT TIE OFF – work your sleeve cuff ribbing perpendicular to the piece.
Sleeve Cuff, Hem and Neck Ribbing:
Sleeves: In the last ST of your row, CH 5 then work your 4 x SCBLO across the end of the sleeve to create your cuff. (if you don’t know how to work perpendicular ribbing on to an existing piece, you can find lots of tutorials online). You should have the following (or 1 less than) the number of ST’s in your last sleeve row, so (49/49/57/57/65/65/73/73/73). I like to do my SCBLO ribbing with the last ST on the end of the up rows being through both loops on the ST instead of through the back loop as I think it gives a cleaner edge, but it’s up to you.
Hem: Working perpendicular across the bottom of each sweater panel, Tie on and CH 9, then work your 8 x SCBLO rows across the bottom of each panel to create your hem.
Neck Ribbing: Find the center stitch in the neck hole (this will be the back as you will seam your ribbing together there) and CH 5 then work your 4 x SCBLO around the entire neck hole. YO and tie off leaving a long enough tail to seam the 4 x SCBLO ribbing ends together.
“Priscilla” Off The Shoulder Crochet Sweater – ASSEMBLY:
– Turn the entire piece right side in/wrong side out.
– Cut a 3 – 4 foot piece of yarn for seaming each side.
– Using your tapestry needle, start at the end of each your sleeve cuff ribbing and whip stitch from the end of the sleeve to the armpit and continue all the way down to the bottom hem of the sweater. Do this on both sides.
– Turn the piece right side out.
- Weave in all ends and enjoy your gorgeious Priscilla Sweater!