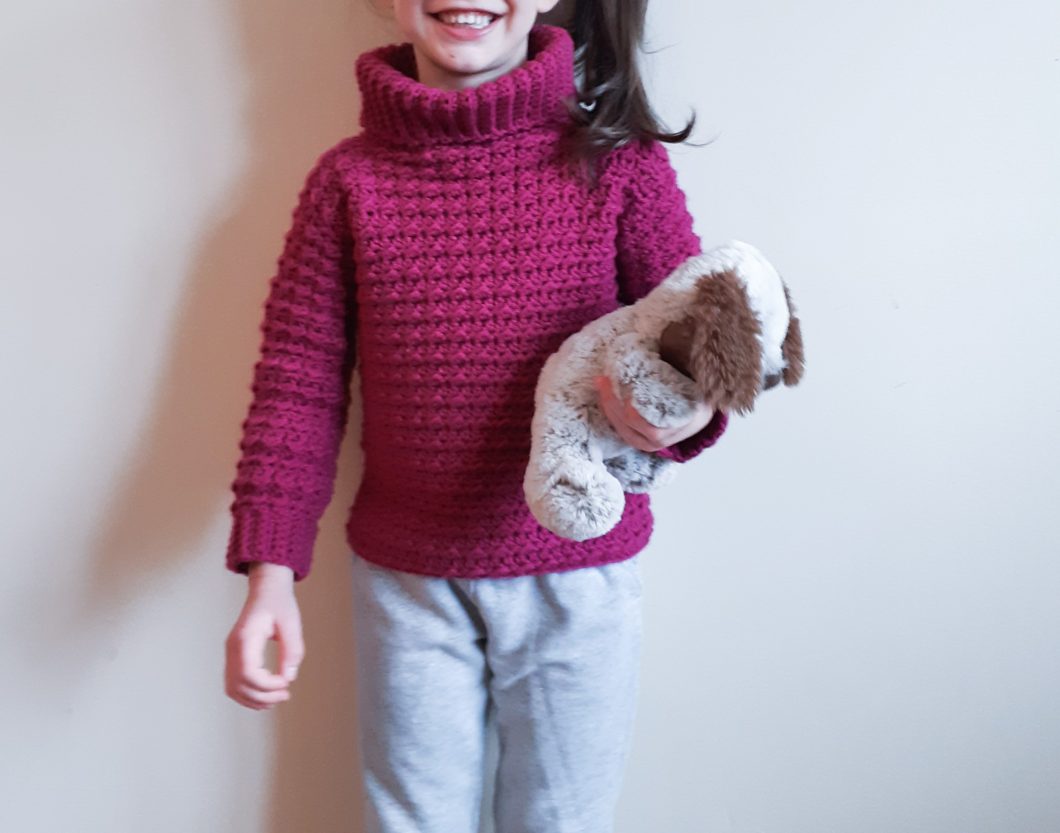
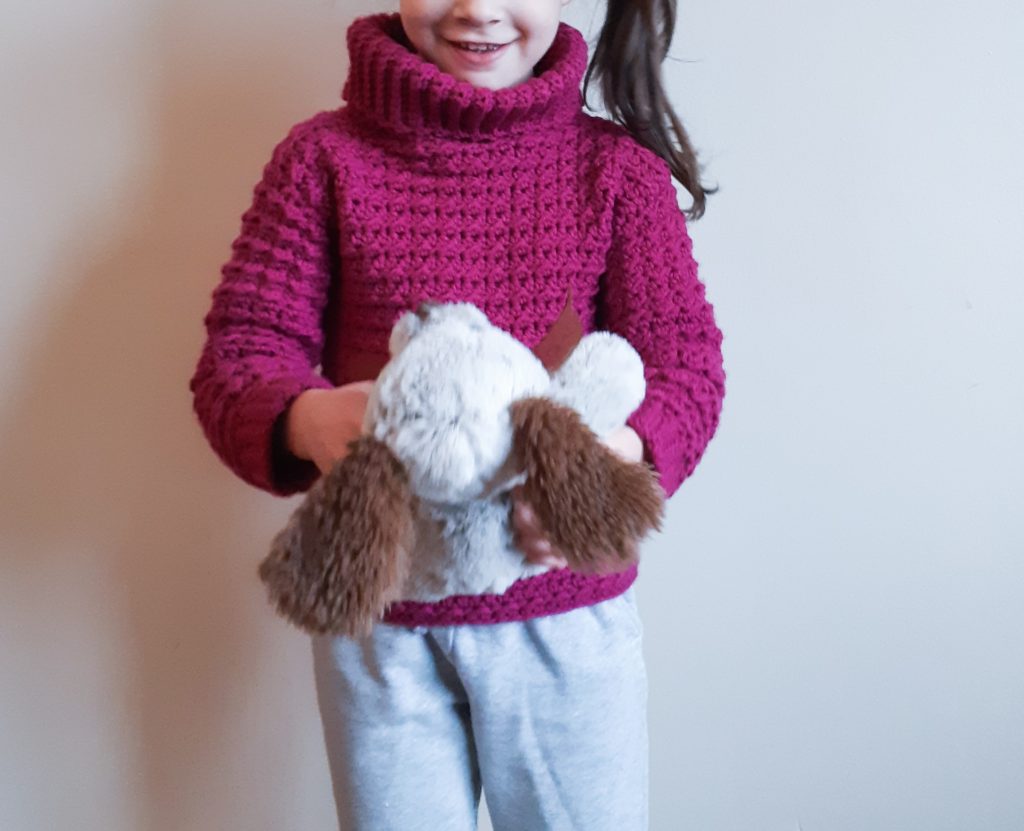
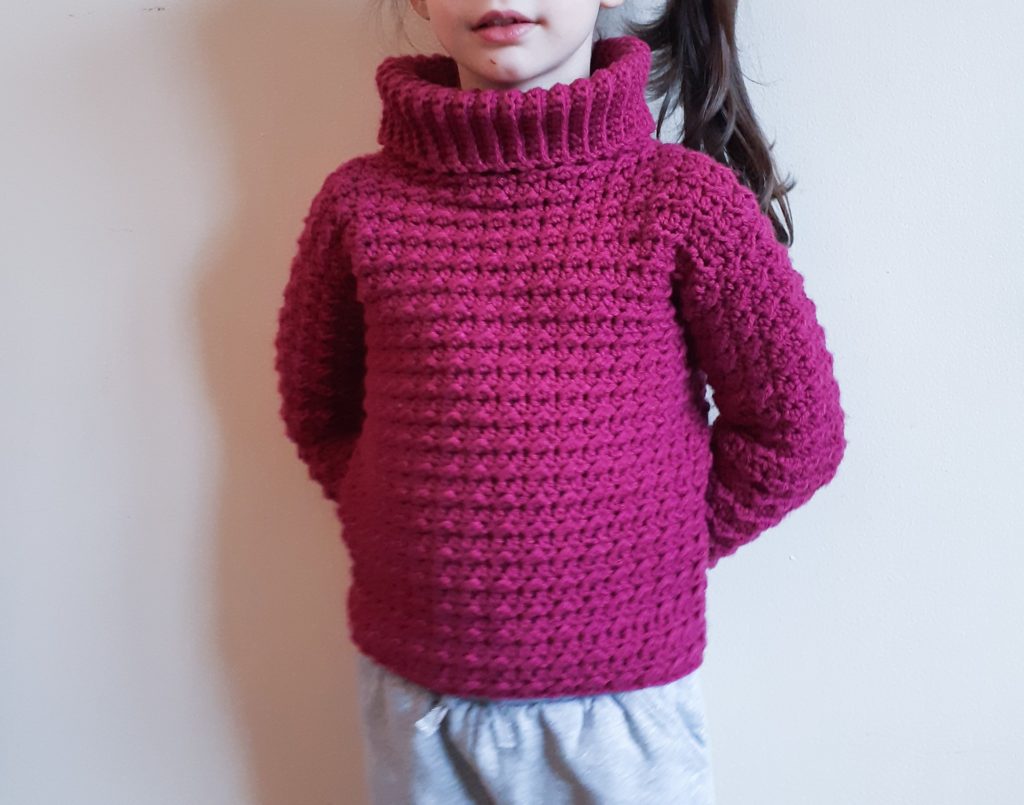
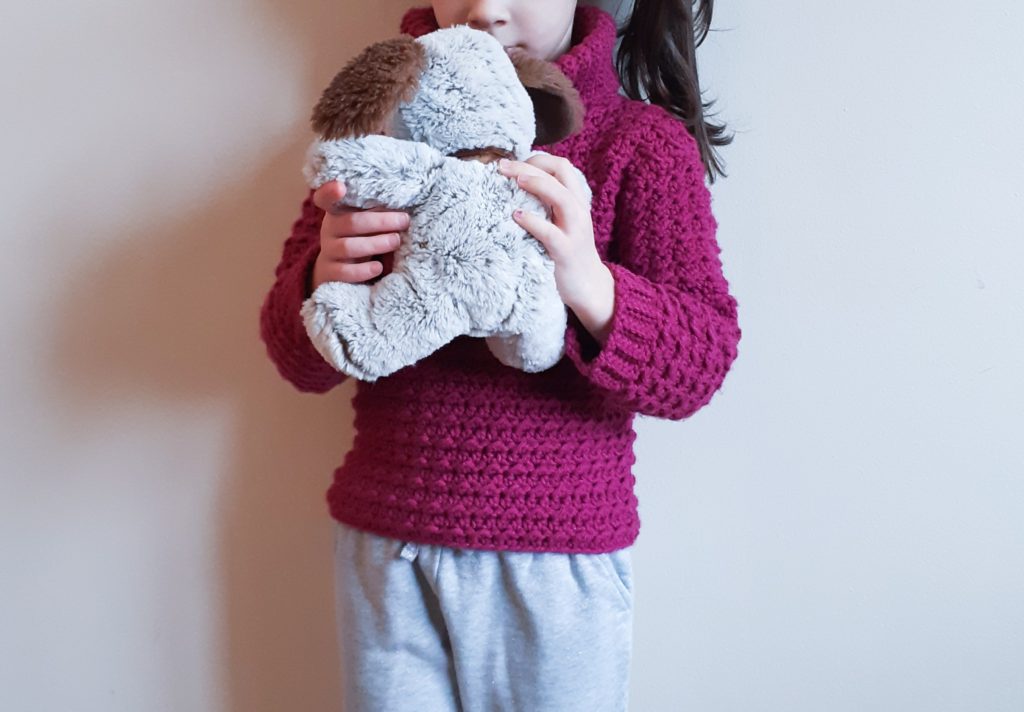
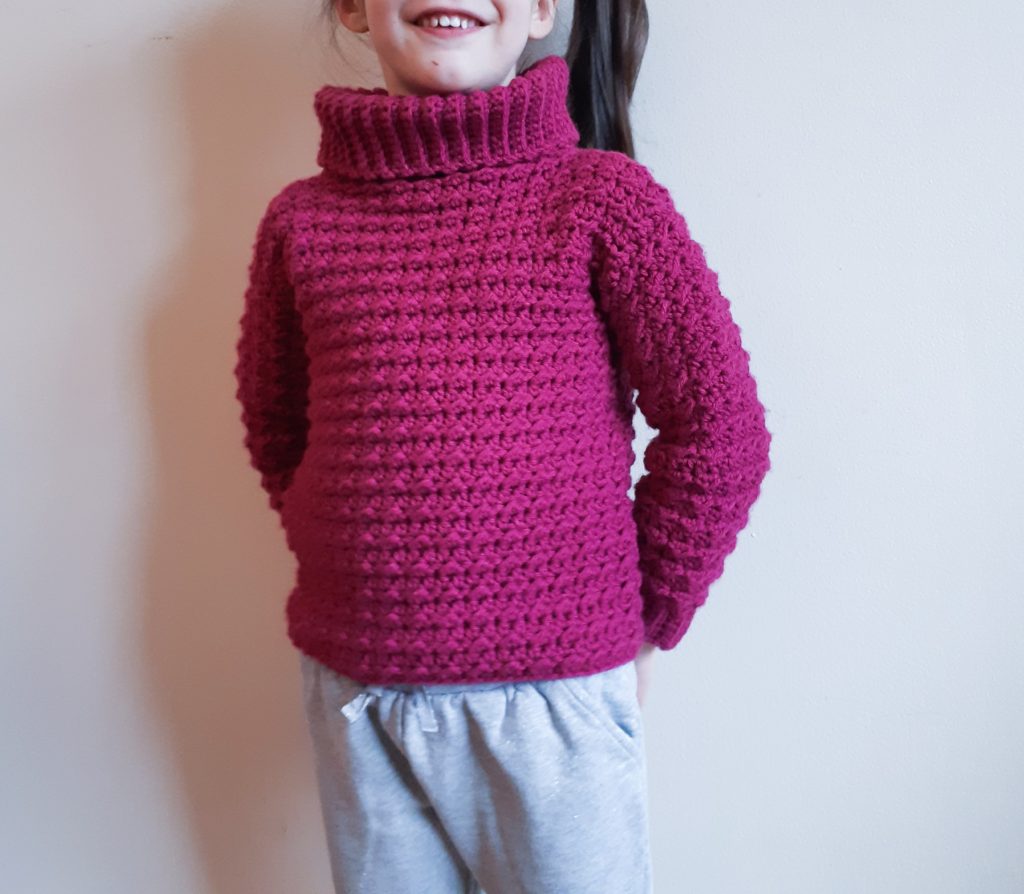
I’m absolutely thrilled with how this darling crochet kid’s sweater turned out for my daughter. I’ve made her lots of things before, but haven’t ever published a pattern for kid’s garments until now. As if I don’t already think she’s insanely adorable, to see her in this cute little turtleneck just melts me!
This is a really easy piece, modeled after a few of my other sweaters in that it’s made as 1 long rectangle with a neck hole and then the arms are crocheted right on and then sleeve cuffs and the turtleneck (which is completely optional, by the way) are added and then everything is seamed.
I’m actually really seriously thinking of also releasing this in an adult version too, would you make it? Maybe with a V-neck?
The stitches for this crochet girl’s sweater are simple, it’s actually alternating the Even Moss Stitch with rows of HDC. It creates a beautiful texture but one that isn’t too overly busy or complicated for a small child.
I chose to use Loops & Threads Impeccable in Rich Orchid because my little girl looks so amazing in jewel tones and I like the Impeccables yarn because it softens so well after washing. This kid’s sweater could easily also work for a boy by doing a crew neck instead of a turtleneck, and using a blue or grey or olive color. The Impeccables line has 50+ shades, so you’ll find any color you want!
The pattern for this cute crochet kid’s sweater ranges from 2Y to 10Y but if you’re experienced enough, you could use the gauge to recalculate for sizes above 10Y.
For more patterns where I use this pretty textured Even Moss Stitch, check out my Lighting Quick Glasses Case or my Sunday Throw. For more sweaters, check out my Robin Pullover or Meadow Pullover.
LET’S GET MAKING! Scroll down for the FREE pattern for this crochet kid’s sweater below OR you can PURCHASE the Ad-Free, printable version from my Etsy store HERE.
SUPPLY LIST:
6mm hook
Any Category 4 yarn (Yarn Used: Loops & Threads Impeccable in Rich Orchid)
Approx yardage for sizes:
2: 490y/448m, 4: 565y/515m, 6: 655y/595m, 8: 760y/695m, 10: 870y/795m
Scissors Tapestry needle
STITCHES & ABBREVIATIONS:
CH – chain
ST – stitch
SL ST – slip stitch
SC – single crochet
SCBLO – single crochet in the back loop only HDC – half double crochet
SIZES:
2Y, 4Y, 6Y, 8Y, 10Y
FINISHED MEASUREMENTS:
Please note that measurements are given for circumference and length from shoulder seam the bottom hem.
2Y: 20” circumference x 10” length
4Y: 24” circumference x 13” length
6Y: 26” circumference x 15” length
8Y: 27” circumference x 16” length 10Y: 28” circumference x 17” length
GAUGE:
13 rows x 13 stitches = 4” x 4”
DIFFICULTY LEVEL:
Intermediate
crochet girl’s sweater
PATTERN & SIZING NOTES:
– This Kara Kid’s Sweater is made as one rectangular piece with a neck hole and the sleeves are crocheted on to the sides. Seaming is required from the sleeve cuff down to the bottom hem and the turtleneck and the sleeve cuffs are made separately and sewn on.
– The turtleneck on this crochet girl’s sweater is optional and the sweater can simply be finished as a crew neck by doing a finishing round of slip stitch around the neck opening.
– If you are familiar with how to create perpendicular ribbing right on to your project, by all means, you can do this for the sleeve cuffs and the turtleneck. For the sake of this pattern, however, I have written it as separate cuffs and turtlenecks being created and sewn on.
– The textured stitch in this sweater is the Even Moss Stitch, but for the purposes of this pattern, I will just refer to it as alternating SL ST & HDC in every 2nd row.
– Turning chains do NOT count as a stitch.
– Use the following Size Key (*SK*) indicated in parentheses in reference to the size you are crocheting: (*SK*: 2Y, 4Y, 6Y, 8Y, 10Y) – I suggest taking a highlighter to mark the appropriate sizing references for the size you’re crocheting, to make it easier to follow the pattern – Stitch count for each round will be indicated in parentheses ( ) at the end of the row
crochet kid’s sweater
INSTRUCTIONS:
FRONT PORTION:
* reminder the entire body of this crochet kid’s sweater is made as one continuous piece with a neck hole but I have broken down the sections as Front Portion, Neck Hole Row and Back Portion for easier row counting.
CH (*SK*: 31, 37, 41, 43, 45) + 2 to turn
Row 1: in the 3rd CH from the hook, HDC in each ST across, CH 1 & turn (*SK*: 31, 37, 41, 43, 45)
Row 2: Alternate SL ST & HDC all across the row, so that you’re starting and ending the row with a SL ST, CH 2 & turn (*SK*: 31, 37, 41, 43, 45)
Row 3: HDC in each ST across the row, CH 1 & turn (*SK*: 31, 37, 41, 43, 45)
Row 4: Alternate SL ST & HDC all across the row, so that you’re starting and ending the row with a SL ST, CH 2 & turn (*SK*: 31, 37, 41, 43, 45)
Rows 5 to 42: repeat rows 3 & 4 over again until you reach the end of row 42 (which will be a repeat of row 4), then CH 2 & turn (*SK*: 31, 37, 41, 43, 45)
NECK HOLE ROW:
Do HDC across the row except CH & SK ST’s for the following #’s according to your size
2Y: HDC x 6, then 19 x CH and 19 x SK ST, then HDC x 6 (31)
4Y: HDC x 8, then 21 x CH and 21 x SK ST, then HDC x 8 (37)
6Y: HDC x 8, then 25 x CH and 25 x SK ST, then HDC x 8 (41)
8Y: HDC x 8, then 27 x CH and 27 x SK ST, then HDC x 8 (43)
10Y: HDC x 8 then 29 x CH and 29 x SK ST, then HDC x 8 (45)
At the end of the row, CH 2 & turn (*SK*: 31, 37, 41, 43, 45)
BACK PORTION:
Row 1: Alternate SL ST & HDC all across the row, so that you’re starting and ending the row with a SL ST, CH 2 & turn (*SK*: 31, 37, 41, 43, 45)
Row 2: HDC in each ST across the row, CH 1 & turn (*SK*: 31, 37, 41, 43, 45)
Row 3: Alternate SL ST & HDC all across the row, so that you’re starting and ending the row with a SL ST, CH 2 & turn (*SK*: 31, 37, 41, 43, 45)
Row 4: HDC in each ST across the row, CH 1 & turn (*SK*: 31, 37, 41, 43, 45)
Rows 5 to 42: repeat rows 3 & 4 over again until you reach the end of row 42 (which will be a repeat of row 4), then CH 2 & turn (*SK*: 31, 37, 41, 43, 45)
Tie off.
SLEEVES:
On the sides of this crochet kid’s sweater, at the top of the shoulders, mark the row that is the neck hole row with a marker and count down either side the following amount of rows and mark these too:
2Y: count down 11 on either side of the neck hole marker
4Y: count down 13 on either side of the neck hole marker
6Y: count down 15 on either side of the neck hole marker
8Y: count down 16 on either side of the neck hole marker
10: count down 17 on either side of the neck hole marker
Tie on and CH 1, remover the middle marker
Row 1: in the same ST you tied on, SL ST x 1 (the CH 1 will not count as a ST) and alternate between SL ST and HDC all across the row so that you’re starting and ending the row with a SL ST, CH 2 & turn (*SK*: 23, 27, 31, 33, 35)
Row 2: HDC in each ST across the row, CH 1 & turn (*SK*: 23, 27, 31, 33, 35)
Row 3: Alternate SL ST & HDC all across the row, so that you’re starting and ending the row with a SL ST, CH 2 & turn (*SK*: 23, 27, 31, 33, 35)
Remainder of rows: Repeat rows 2 & 3 until you have the following number of rows per size: 26, 30, 34, 36, 38 and be sure to end on a row of HDC.
RIBBED SLEEVE CUFF:
For all sizes, CH 7 + 1
Row 1: in the 2nd CH from the hook, SC in each CH across, CH 1 & turn (7)
Row 2: SCBLO in each ST across, CH 1 & turn (7)
Remainder of rows: Repeat row 2 until you have the following number of rows per size: 26, 30, 34, 36, 38
Tie off
Repeat the all the instructions above for the other sleeve cuff
RIBBED TURTLENECK:
For all sizes, CH 20 + 1
Row 1: in the 2nd CH from the hook, SC in each CH across, CH 1 & turn (20)
Row 2: SCBLO in each ST across, CH 1 & turn (20)
Remainder of rows: Repeat row 2 until you have the following number of rows per size: 38, 42, 50, 54, 58
Tie off
FINAL ASSEMBLY:
– Turn the sweater inside out so that the right sides are facing in at each other
– Using a length of yarn twice as long as your sleeve cuff, whip stitch the cuff on to the end of each sleeve
– Find the approximate middle stitch at the neck hole (this will be your middle back and the starting point for attaching your turtleneck)
– Using a length of yarn twice as long as your turtleneck, whip stitch the turtleneck on to the neck hole. And then whip stitch up the length of the turtleneck edges to attach them together, tie off
– While the sweater is still inside out, line up your sleeve and side edges – you can use markers to hold it together if you like, I usually do this at the armpit only
– With a length of yarn, from the end of each sleeve, use your tapestry needle to whip stitch (or any seaming technique of twice as long as the distance from your sleeve cuff to the bottom hem of the sweater, whip stitch (or a stitch of your choice) starting from the end of the sleeve cuff to the armpit and all the way down each side and tie off/secure.
– Weave in all your ends and voila, a totally darling crochet kid’s sweater to keep them cozy and warm!