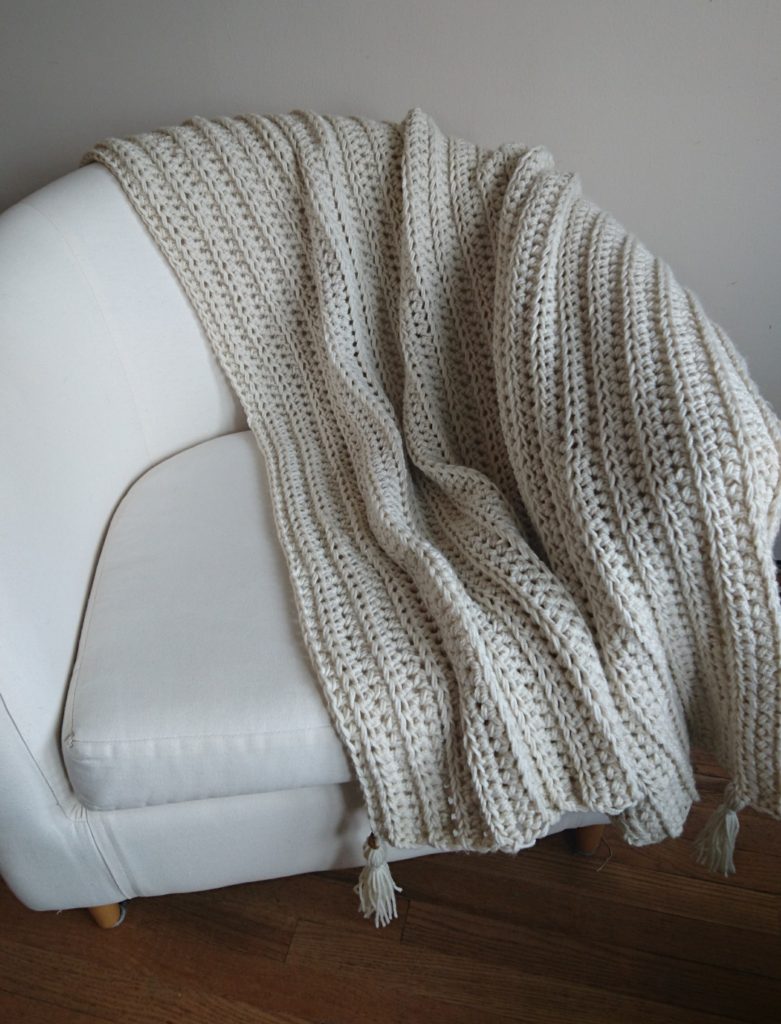
In my opinion, a home can never have too much hygge. Is there a threshold I haven’t been told about? I don’t think so. And so at any given time, there are at least 6 or 8 throw blankets stored or draped or displayed in various areas of the house. This Chunky Ribbed Crochet Throw has become my new favorite!

Whether sitting with a cup of tea and a book or snuggling up with the kids, this ribbed crochet throw blanket is a soft and squishy go-to. It is simple and stylish in its aesthetics but has a lot of texture too. I love doing this one in a solid color but you could easily add other colors or alter the design to make it your own.
For more blanket and throw ideas, check out the Faith Blanket, the Andrea Blanket and the Luna Lap Throw.
LET’S GET MAKING! Scroll down for the free pattern for this crochet throw blanket OR you can get the Ad-Free, printable version from my Etsy store HERE
SUPPLY LIST – 10mm hook, Any Category 4 ww yarn, Approx 2000 yards (1828 metres), Scissors, Tapestry needle, Wood Beads (optional)
STITCHES / ABBREVIATIONS – CH – chain, HDC – half double crochet, BLO – back loop only
SIZES – N/A
FINISHED MEASUREMENTS – 60″ width x 45″ length
GAUGE – 8 stitches x 6 rows = 4″ x 4″
DIFFICULTY LEVEL – Beginner
PATTERN & SIZING NOTES –
– This ribbed crochet throw is created using 2 strands of Category 4 weight ww yarn together to create the chunky/bulky look
– You must be familiar with working in the back loop of the stitch to create the ribbed effect
– The ribbing is created by alternating rows of HDC with rows of HDC in the BLO
INSTRUCTIONS –
RIBBED CROCHET THROW BLANKET:
CH 120 + 2, turn
ROW 1: HDC in each stitch across (120)
ROW 2: HDC in BLO in each stitch across (120)
Repeat Rows 1 & 2 for 60 rows
SL ST in the last stitch of Row 60, cut and weave in ends
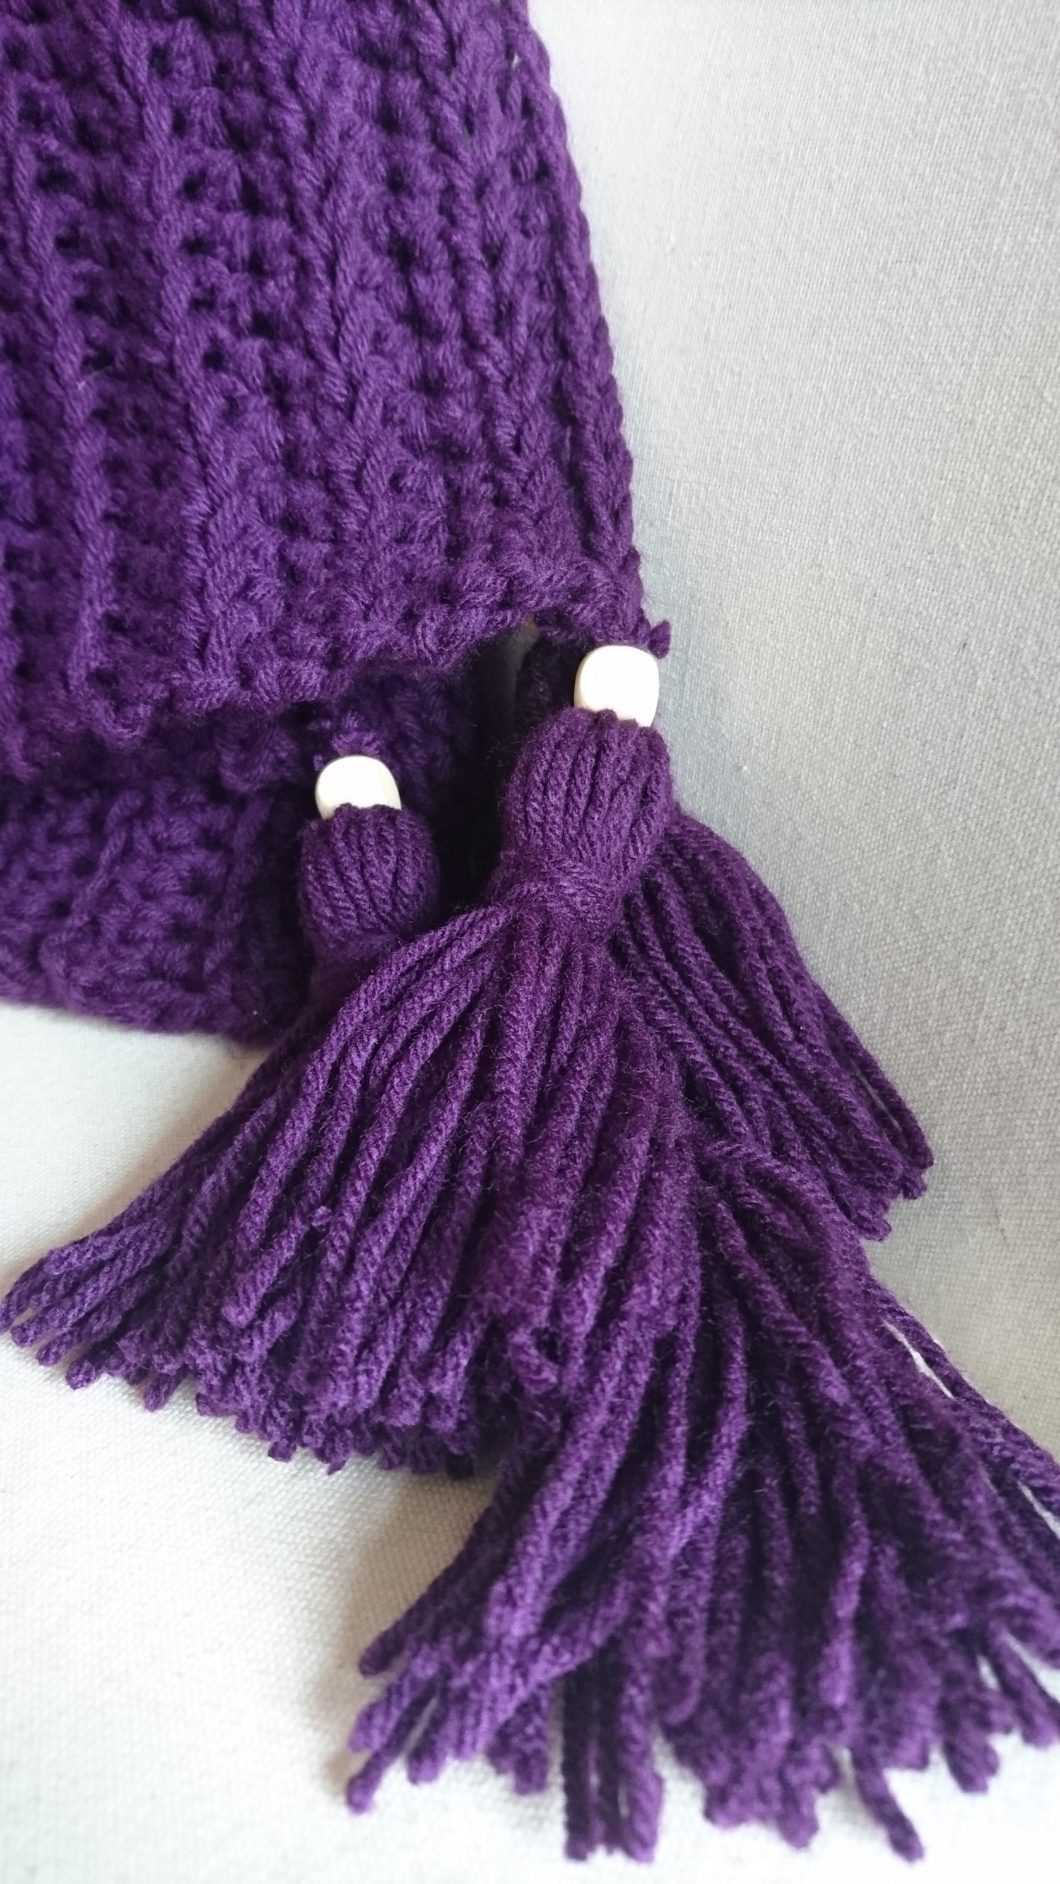
TASSELS:
* There are lots and lots of online tutorials for creating tassels crochet throw blankets using yarn and I recommend you watch a few to get the idea, but here is also a written description of how I do my tassels for this blanket
* Beads are optional, you thread them on to the tie at the top of the tassel just prior to affixing the tassels to the blanket
– To create the tassels, find a rigid item about 8” in length (I use a hard cover book)
– Wind the yarn around the item (book) 30 full times and cut so both ends are at the bottom
– Remove the winding from the item and keep it folded in half and cut all the yarn across the bottom
– Cut 1 length of yarn about 3 feet to be used to affix the tassel to the blanket
– Cut 1 length of yarn about 5 feet long to be used to wind around the bulb of the tassel
– Unfold the bundle of yarn and lie it straight on a flat surface – take the first 3’ length of yarn and place it under this bundle in the middle of the bundle, tie tightly in a knot (this will be the piece which affixes to the blanket)
– About 1.5 inches down from the fold at the top of your yarn, tie the second 5’ length of yarn tightly in a knot and begin to wind each side of the knot around the bundle in opposite directions to create the winding under the tassel bulb – wind 20 or so times and tie the ends back together, taking care to cut the ends and tuck the knot in under the winding
– Trim the tassel bottom to approx. 4” in length from the cinched winding around the bulb so all lengths of yarn in the tassel are the same length – this may take a few careful trimmings
– To affix the tassel to the blanket, use a tapestry needle or a smaller crochet hook to bring one length through each corner – tie in a tight knot and weave in the ends with your tapestry needle.
Voila! A hygge and stylish ribbe crochet throw blanket that looks like knit (I won’t tell 😉