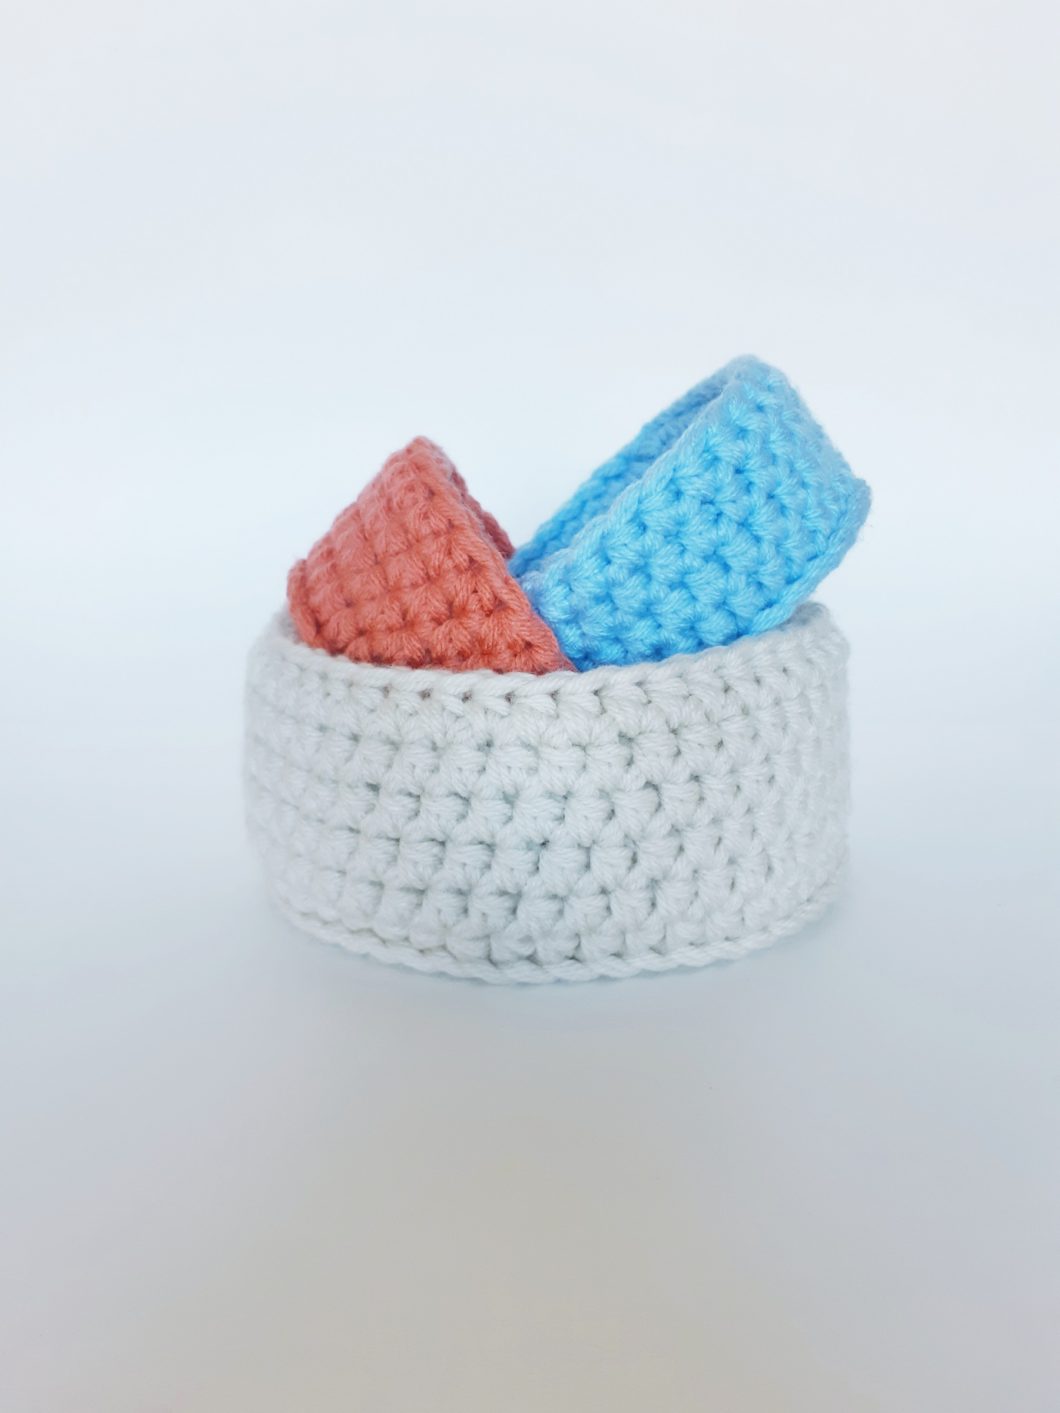
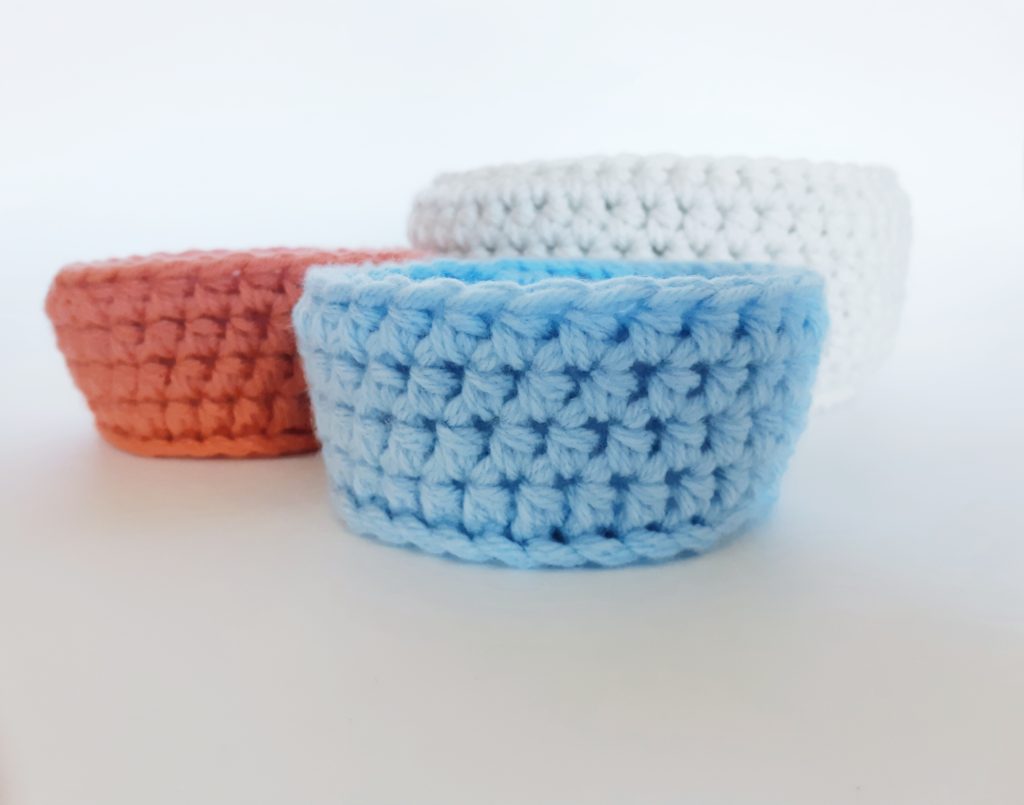
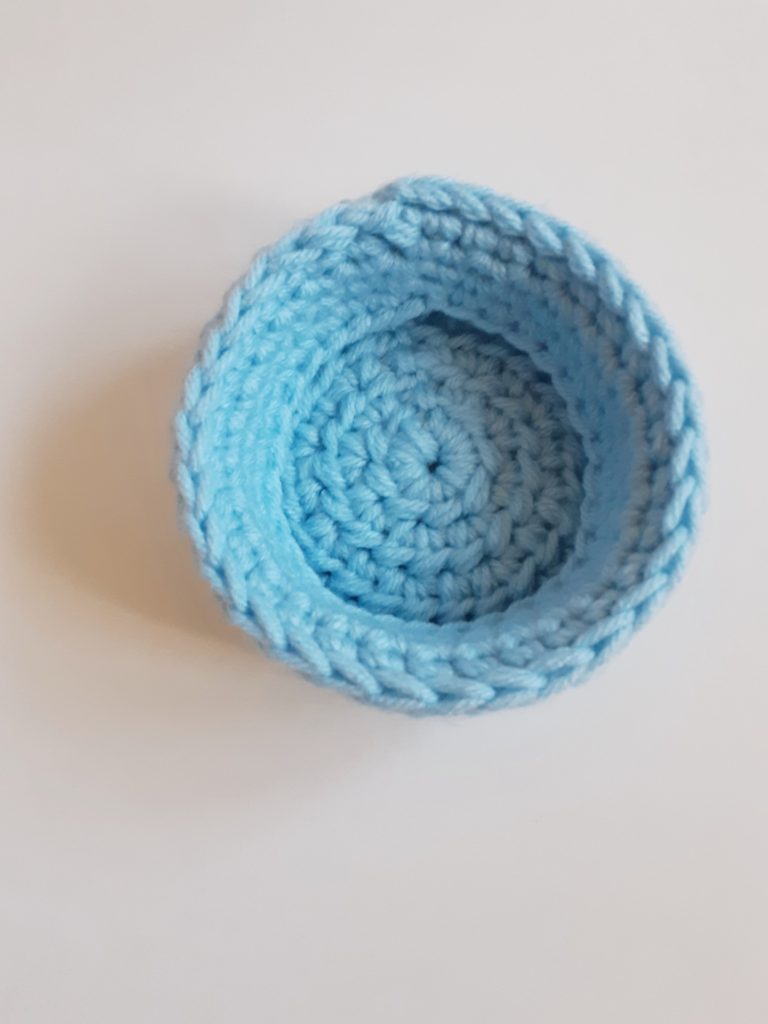
Introducing the adorable Easy Crochet Mini Basket pattern that is so incredibly easy it’s crazy! The pattern comes in 2 sizes, if you want to make a set. One is truly mini, the other a smidge larger.
I have had these quick crochet baskets for quite some time now and I used them for a lot of different things. From Easter egg hunts to holding my daughter’s hair ties and clips, this easy crochet mini basket is so versatile. I even keep a few in the bathroom to hold tweezers, nail clippers and small pieces as well as a larger one for my make-up. They would work in any room of the house, really. The larger of the 2 baskets would also make a great basket to build your own gift basket for any occasion.
The idea behind these easy crochet mini baskets (aside from being insanely easy) is that it can be made in any size and that there are always an equal number of rows on the bottom, sides and on the inside layer. So have a little fun with this pattern, make it your own and create a much larger one based on this principle, I would love to see what you come up with!
If you like crochet homewares, check out my Toilet Paper Basket, Chunky Spa Basket or 1 Skein Nesting Basket.
LET’S GET MAKING! Scroll down for the free pattern for the Easy Crochet Mini Basket OR you can get the Ad-Free, printable version from my Etsy store HERE
SUPPLY LIST – 5.5 mm hook, Any Category 4 WW Yarn, Approx 30 yards (27 metres) for smaller basket and 60 yards (55 metres) for bigger basket, Scissors, Tapestry needle
STITCHES / ABBREVIATIONS – CH – chain, SL ST – slip stitch, SC – single crochet, HDC – half double crochet, 3rdL – third loop, YO – yarn over
SIZES – N/A
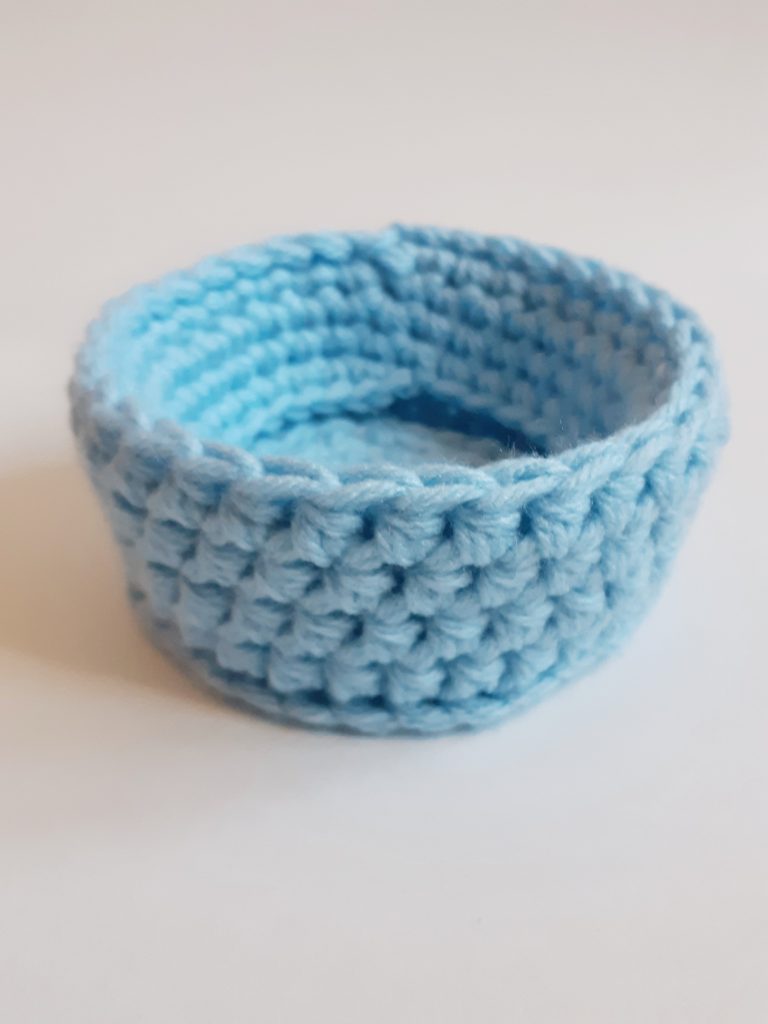
FINISHED MEASUREMENTS – Smaller mini basket – 4” width x 2” height
Bigger mini basket – 7” width x 3” height
GAUGE – N/A
DIFFICULTY LEVEL – Beginner
PATTERN & SIZING NOTES –
– This quick crochet basket is created using 2 strands of 4 weight ww yard together to create the chunky/bulky look
– The basket is ‘double walled’ meaning that, after the initial sides of the basket are completed, we create another layer which gets folded in to the inside of the basket to provide stability
– The inside layer of the basket is created working in a spiral, use a stitch marker to mark the first stitch in each round
– This project follows the general rule of an equal number of rows for the bottom, the sides and the inside layer (ie 4, 4 & 4 for the smaller basket and 6, 6 & 6 for the bigger basket)… as such, it can be adjusted to any size assuming the appropriate increases are used for any additional rows when creating the bottom of the basket
– The yardage is approximate based on the gauge of the pattern
INSTRUCTIONS –
SMALLER EASY CROCHET MINI BASKET:
Holding together 2 strands of yarn, create foundation ring by chaining 4 and SL ST together to form a ring
BOTTOM & SIDES:
ROW 1: 8 HDC all around, SL ST in top of chain 2 (8)
ROW 2: 2 HDC in each stitch around, SL ST in top of chain 2 (16)
ROW 3: <1 HDC in 1st stitch, 2 HDC in 2nd stitch> repeat <> for the row, SL ST in top of chain 2 (24)
ROW 4: <1 HDC in first 2 stitches, 2 HDC in 3rd stitch> repeat <> for the row, SL ST in top of chain 2 (32)
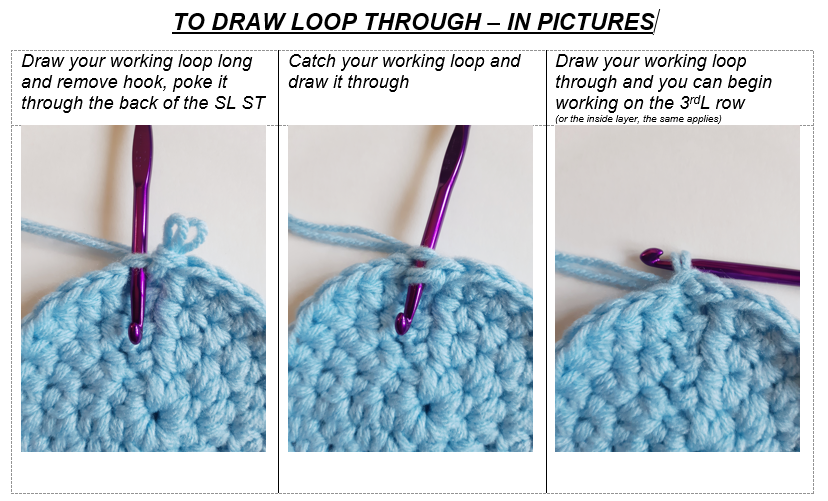
**Draw your working loop long, remove hook and poke it through the SL ST you’re in from the back and draw your working loop through the stitch so we can begin working in the 3rdL without pulling the yarn over top of the stitch and keeping a cleaner look to the base of the basket.
**Chain 2 once your working loop is pulled through to begin working in the 3rdL
ROW 5: 1 HDC in 3rdL for the row, SL ST in top of chain 2, chain 2 (32)
ROW 6: 1 HDC in each ST for the row, SL ST in top of chain 2, chain 2 (32)
ROW 7: 1 HDC in each ST for the row, SL ST in top of chain 2, chain 2 (32)
ROW 8: 1 HDC in each ST for the row, SL ST in top of chain 2, chain 2 (32)
INSIDE LAYER:
** Draw your working loop long, remove hook and poke it through the SL ST you’re in from the back and draw your working loop through the stitch so we can begin working the inside layer of the basket without pulling the yarn over top of the stitch and keeping a cleaner look to the base of the basket.
** This inside layer portion is worked in a spiral so use a stitch marker to mark the first stitch in your round
** Chain 1 once your working loop is pulled through to begin working on the inside layer
ROUND 9: 1 SC in each ST for the round (32)
ROUND 10: 1 SC in each ST for the round (32)
ROUND 11: 1 SC in each ST for the round (32)
ROUND 12: 1 SC in each ST for the round (32)
YO SL ST to tie off, cut, weave in ends and fold the SC portion inside the basket
BIGGER EASY CROCHET MINI BASKET:
Holding together 2 strands of yarn, create foundation ring by chaining 4 and SL ST together to form a ring
BOTTOM & SIDES:
ROW 1: 8 HDC all around, SL ST in top of chain 2 (8)
ROW 2: 2 HDC in each stitch around, SL ST in top of chain 2 (16)
ROW 3: <1 HDC in 1st stitch, 2 HDC in 2nd stitch> repeat <> for the row, SL ST in top of chain 2 (24)
ROW 4: <1 HDC in first 2 stitches, 2 HDC in 3rd stitch> repeat <> for the row, SL ST in top of chain 2 (32)
ROW 5: <1 HDC in first 3 stitches, 2 HDC in 4th stitch> repeat <> for the row, SL ST in top of chain 2 (40)
ROW 6: <1 HDC in first 4 stitches, 2 HDC in 5th stitch> repeat <> for the row, SL ST in top of chain 2 (48)
**Draw your working loop long, remove hook and poke it through the SL ST you’re in from the back and draw your working loop through the stitch so we can begin working in the 3rdL without pulling the yarn over top of the stitch and keeping a cleaner look to the base of the basket.
**Chain 2 once your working loop is pulled through to begin working in the 3rdL
ROW 7: 1 HDC in 3rdL for the row, SL ST in top of chain 2, chain 2 (48)
ROW 8: 1 HDC in each ST for the row, SL ST in top of chain 2, chain 2 (48)
ROW 9: 1 HDC in each ST for the row, SL ST in top of chain 2, chain 2 (48)
ROW 10: 1 HDC in each ST for the row, SL ST in top of chain 2, chain 2 (48)
ROW 11: 1 HDC in each ST for the row, SL ST in top of chain 2, chain 2 (48)
ROW 12: 1 HDC in each ST for the row, SL ST in top of chain 2, chain 2 (48)
INSIDE LAYER:
** Draw your working loop long, remove hook and poke it through the SL ST you’re in from the back and draw your working loop through the stitch so we can begin working the inside layer of the basket without pulling the yarn over top of the stitch and keeping a cleaner look to the base of the basket.
** This inside layer portion is worked in a spiral so use a stitch marker to mark the first stitch in your round
** Chain 1 once your working loop is pulled through to begin working on the inside layer
ROUND 13: 1 SC in each ST for the round (48)
ROUND 14: 1 SC in each ST for the round (48)
ROUND 15: 1 SC in each ST for the round (48)
ROUND 16: 1 SC in each ST for the round (48)
ROUND 17: 1 SC in each ST for the round (48)
ROUND 18: 1 SC in each ST for the round (48)
YO SL ST to tie off, cut, weave in ends and fold the SC portion inside the basket