If you’re anything like me, and I suspect a lot of you are, you have a pretty sizable stash of yarn in all colors, styles, sizes and textures. I can honestly say I might be able to start my own yarn store with the stock I have. That is, until this project came around, the 3-Hour Quick Crochet Tote Bag.
While out one day shopping for yarn for another project, I found on sale 2 skeins of Lion Brand’s Color Made Easy in Wheat. So naturally I bought them! I didn’t know what I was going to do with them but I liked the color and I thought the roving-type texture of it was interesting and not anything I’d worked with before. So I picked them up without a project in mind and just figured a small project idea would come to me.
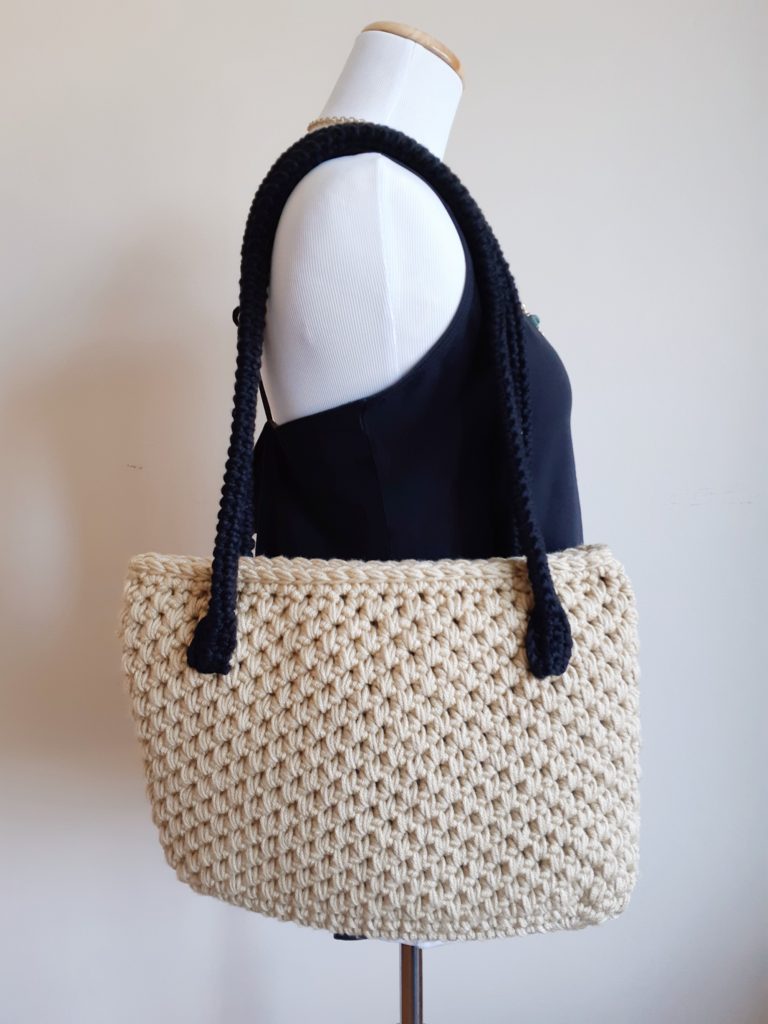
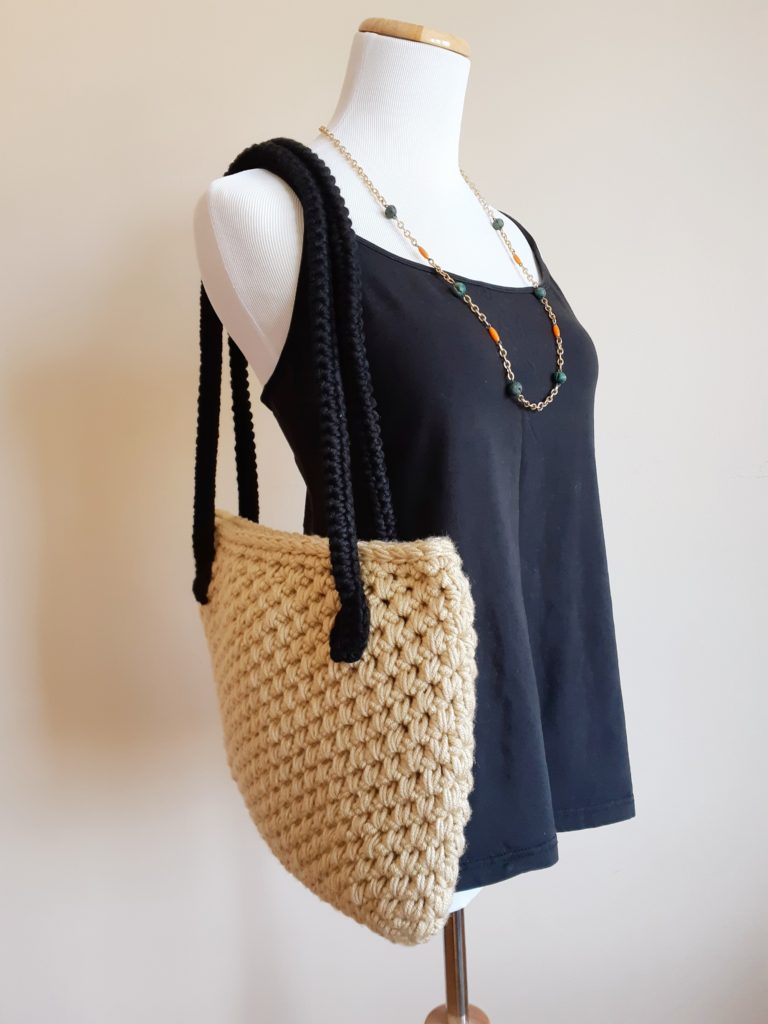
Then I started this easy crochet tote bag, which I wanted to look a little like a retro bag. I wanted it to have a retro feel like something that you may find in a really cool thrift shop. I wanted something that has a lot of style and is adaptable to any outfit and occasion but could also look like it came straight out of 1974.
The color of the Lion Brand yarn was perfect, I thought, for conveying that retro style and feel I was looking for. The color was perfect for it. And hey, I had 2 skeins (which are each 247 yards by the way). I was going to do the quick crochet tote bag and the handles all in the same Wheat color.
Once I had the body of the quick crochet tote bag complete and one of the handles done, I started on the second handle. Only to realize that I didn’t have enough yarn to make the second handle. UGH! Off to the store I go only to find they have no more left, no one knows if and when they’re getting more, none of their other stores have any in stock etc etc.
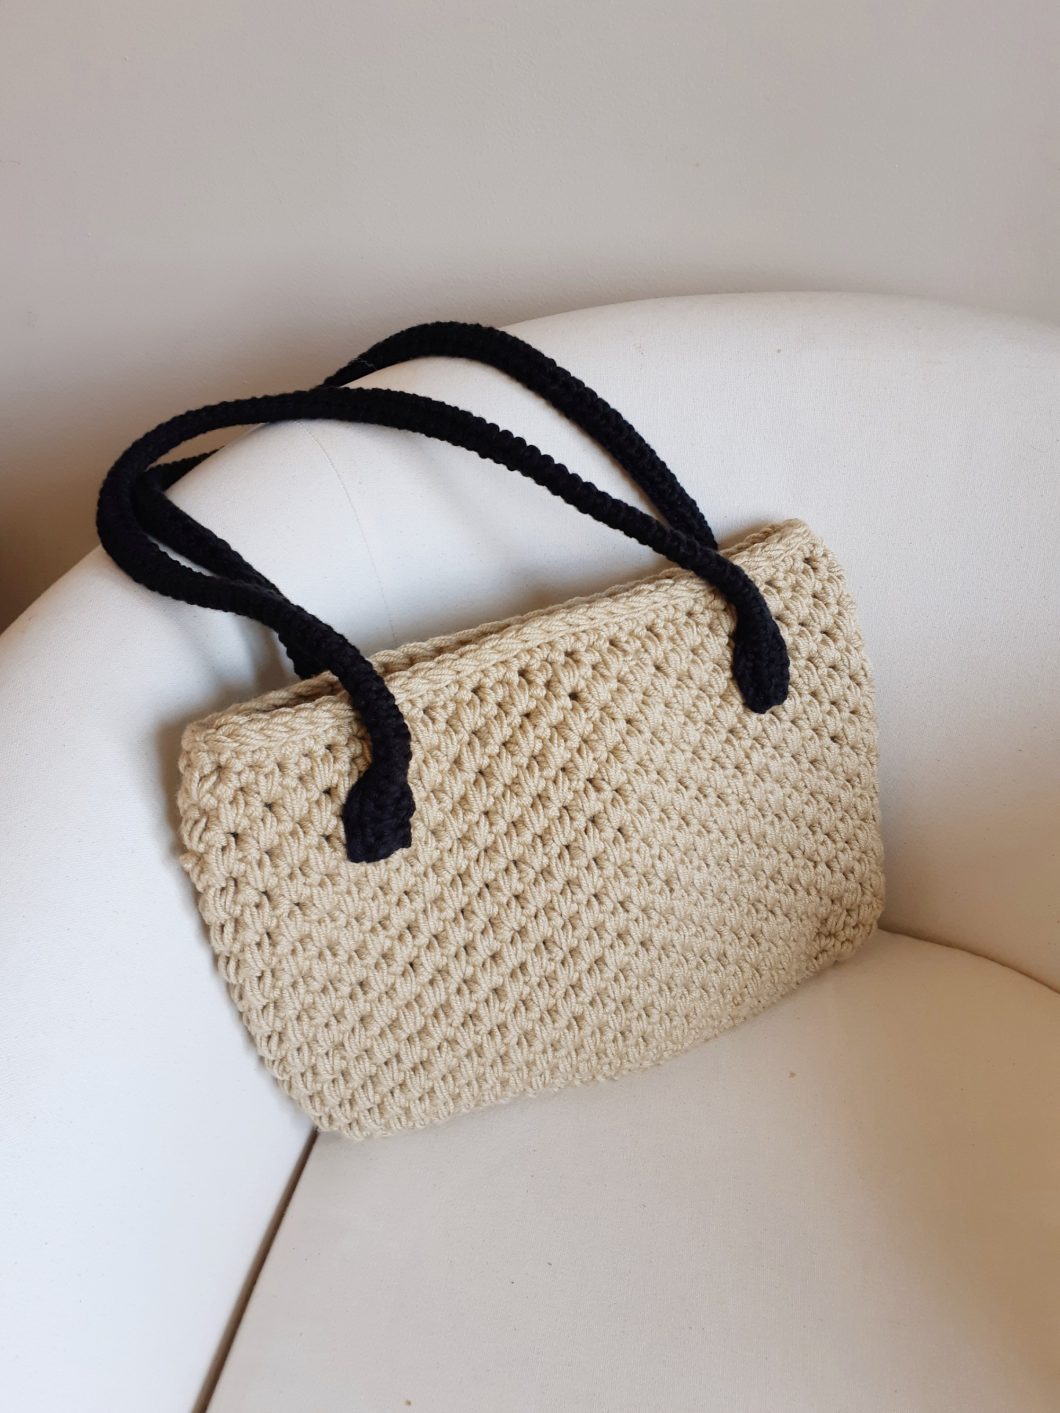
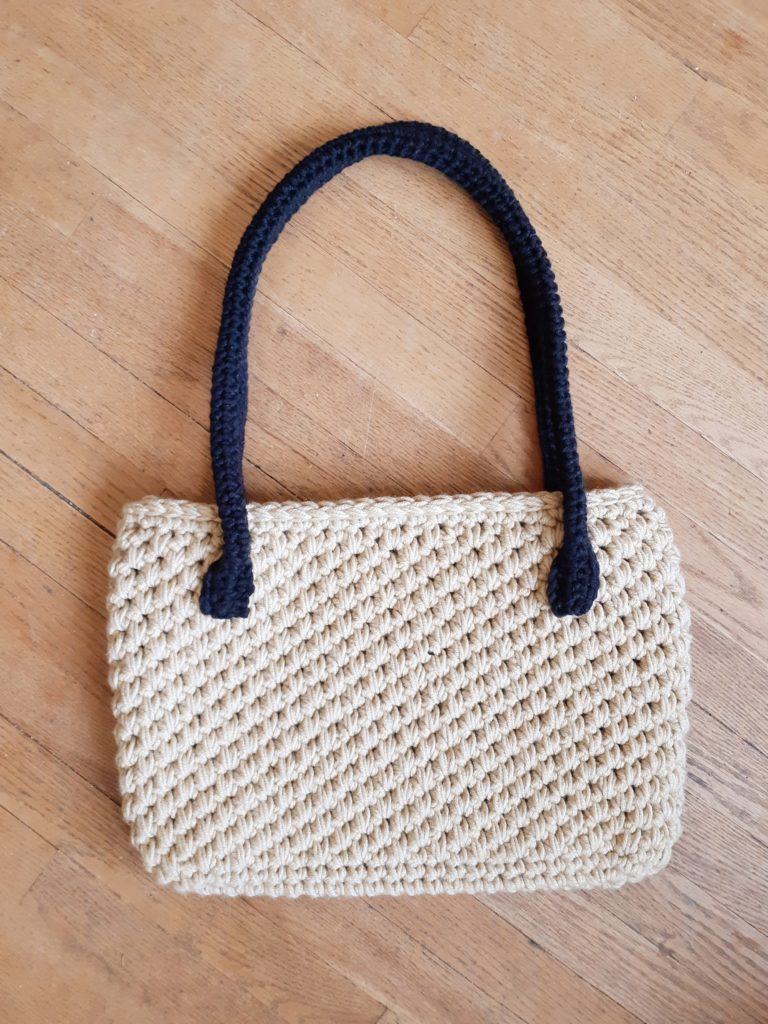
I have 2 toddlers so I don’t have the luxury of running around the city trying to find one skein of yarn. Amazon didn’t have any that wasn’t through 3rd party sellers and also $30 for the skein, so NO! My solution to complete this easy crochet tote bag was to create the handles in black instead. I must admit, I kind of like the contrast and now think I prefer this over a monochrome bag and handles combo.
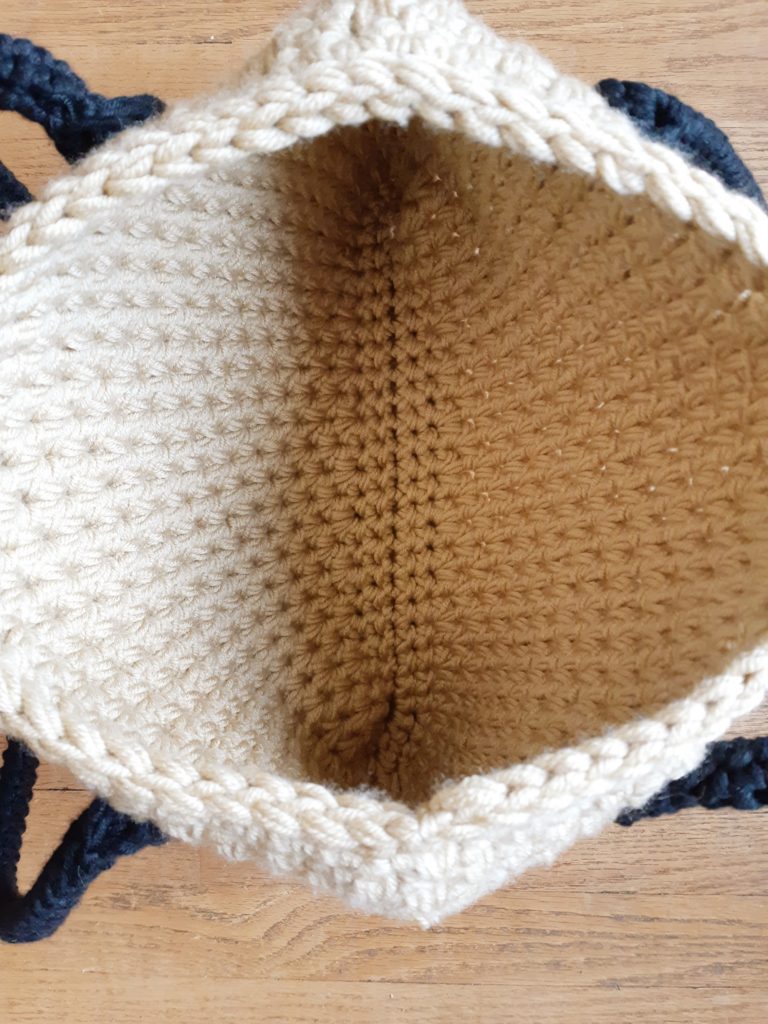
This quick crochet tote bag was created using 2 strands together (my favorite right now, as you can tell) and using the Alternating Spike Stitch so it’s beyond easy to do and, as the name suggests, works up in 3 hours. The Alt Spike Stitch also ends up making this a thick and sturdy bag, so I know I’ll be getting a lot of use out of it.
Try it out this crochet purse in other fun colors or with the same color handles. Try increasing the size or decreasing depending on your needs, it’s an adaptable pattern! Most importantly, have FUN with it!
For more purses, bags & accessories, take a look at the Marais Handbag, the Farmhouse Basket and the Trinity Ear Warmer.
LET’S GET MAKING! Scroll down for the free pattern for the Quick Crochet Tote Bag OR you can get the Ad-Free, printable version from my Etsy store HERE
SUPPLY LIST – 8 mm hook for body of bag, 6.5mm hook for handles of bag, Yarn Used: Color Made Easy in Wheat (body), Color Made Easy in Coal (handles) [5 weight yarn], Approx 480 yards (body), Approx 80 yards (handles), Scissors, Tapestry needle
STITCHES / ABBREVIATIONS – CH – chain, SL ST – slip stitch, SC – single crochet, SK ST – skip stitch
SIZES – N/A
FINISHED MEASUREMENTS – 15.5” width x 10.5” height, handles are 32” full length
GAUGE – Not important, but 7 stitches x 10 rows = 4”x4”
DIFFICULTY LEVEL – Beginner
PATTERN & SIZING NOTES –
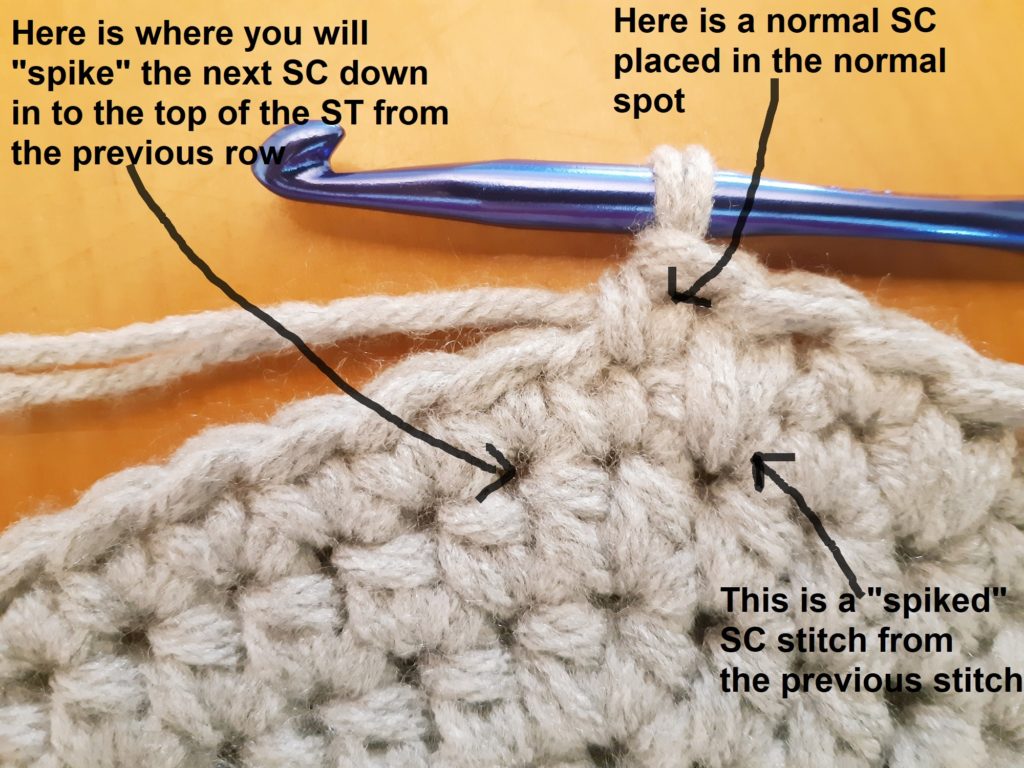
– This quick crochet tote bag is made using the Alternating Spike Stitch in the round, which is a single crochet stitch but alternating between a SC where you normally put it and a SC in the stitch of the row below
– The body of this easy crochet tote is made holding 2 strands of yarn together for a super bulky finish but the handles are made using just one strand
– With the exception of the first 2 rounds of the bottom oval, the body of this bag is made in a continuous spiral starting with a long oval
– For the 1st round of the bottom oval, the CH 1 does not count as a stitch but for the 2nd round of the bottom, we need to add one stitch to have an odd number of stitches for the ‘alternating spike stitch’ used in this pattern so you will add the 57th stitch in this CH 1
– The Alternating Spike Stitch in the round is used for this bag and it requires an odd number of stitches when working in a spiral – if you do not have an odd number of stitches the Alt Spike Stitch won’t work out properly
– Due to the fact this bag is worked in a spiral, the 1st ST of the round shifts to the right so you will have to add approx. 6 to 8 SL ST on the last round so that the tie-off hides better on the side of the bag
INSTRUCTIONS –
TOTE BAG BODY:
BOTTOM OVAL (for 2 Rounds):
Holding 2 strands of yarn together, CH 20 for foundation of your spiral, CH 1 for turning chain and turn to begin
ROUND 1: (48 ST)
– 1 SC in the next 19 ST
– 6 SC in the last ST (ST 20) to turn the corner
– [Working down the back side of the foundation chain] SC in the next 18 ST
– 5 SC in the last ST (ST 1)
– SL ST to the 1st ST
ROUND 2: (56+1 ST)
– CH 1, SC in the next 19 ST
– SC 2 in each of the next 4 ST to turn the corner
– SC in the next 20 ST
– SC 2 in each of the next 4 ST to turn the corner
– SC 1 in your CH 1 ST from the beginning of the row to equal 57 ST total for the round
BAG BODY (for 26 Rounds):
* You should now have 57 ST, mark your 1st stitch in each row as you will now be working in a spiral
ROUND 1: SC in each stitch around, do not join as you are working in a spiral (57)
ROUND 2 to 24: Alternate a SC with a spike SC in to the top of the stitch from the row below (see instructions below for details) (57)
ROUND 25: SC in each stitch around (57)
ROUND 26: SL ST in each stitch around (57) then SL ST any further stitches needed to take you to the corner/side of the bag to hide the tie-off better (this may take about 6-8 ST)
HANDLES:
Using just 1 strand of yarn for the handles, CH 90, CH 1 for your turning CH and turn to begin
ROW 1 to 4: SC in the next 90 ST, CH 1 and turn
MAKE 2 OF THESE
ASSEMBLY:
– Mark the 6th ST up on each side and on each end of the handles
– Fold your handles in half length-wise so they almost create a tube
– Using the Whip Stitch, join the stitches together between the marked stitches, tie off and secure
– Mark your bag where you want your handles attached (mine are attached at 3.5” in from each side and 3” from the top)
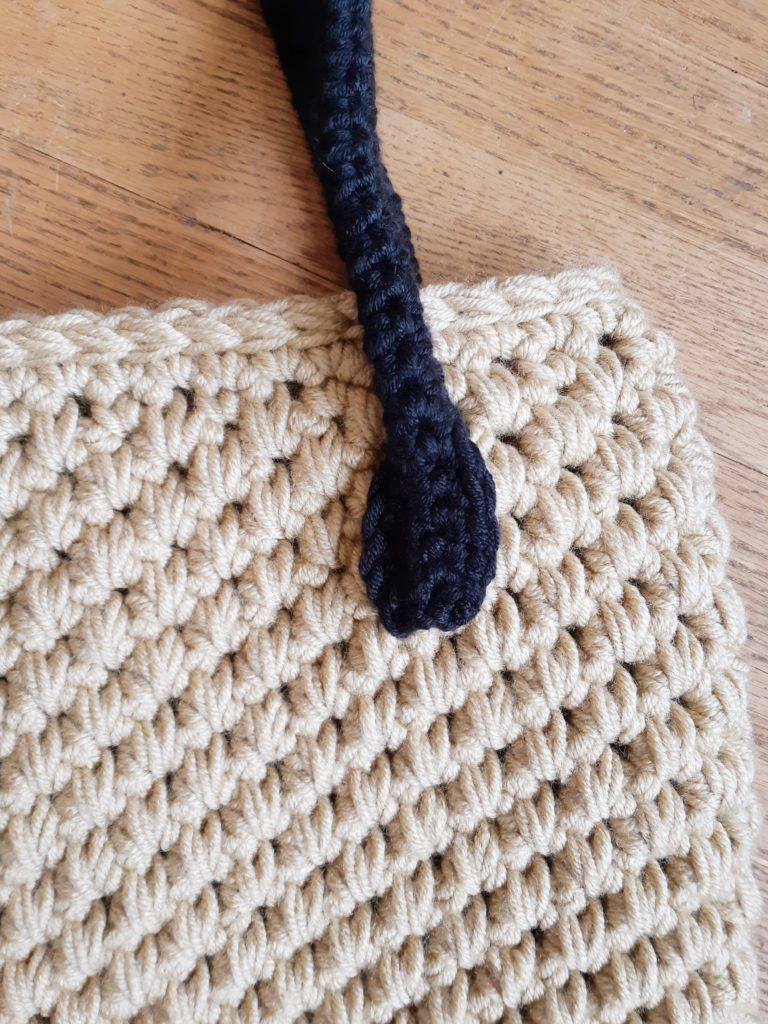
–
Use a method to secure the flattened portion of your handles (the 6
stitches you didn’t whip stitch together) to the body of the bag (I
used additional tapestry needles since they’re thick enough to work
through this bulk yarn – I don’t think regular sewing pins will work)
– Using a tapestry needles, sew
about 2-3 stitches on each side in a square around the outside of the
square where the handle is being affixed – be careful not to sew all
the way through to the inside of the bag if your handles are a
different color, just try to sew it through some of the outside
stitches. This way the different color yarn is not seen sewn through
to the inside of your bag.
– Tie off an weave your ends up the handle to hide them
Enjoy a day at the beach or out on the town with your quick crochet tote bag!
| CROCHETING THE ALTERNATING SPIKE STITCH IN THE ROUND AS A SPIRAL *** To do the Alt Spike Stitch in the round as a spiral, you require an odd number of stitches. This pattern uses 57 stitches for each round *** |
| SIMPLY ALTERNATE BETWEEN A NORMAL SINGLE CROCHET IN THE NORMAL PLACE YOU PUT IT AND A “SPIKED” SINGLE CROCHET PLACED IN THE TOP OF THE STITCH FROM THE PREVIOUS ROW. THIS ELONGATES EVERY SECOND STITCH AND CREATES A STURDY, THICK PROJECT |