“CHINOOK” PULLOVER PONCHO
PURCHASE THE AD-FREE PDF OF THIS CROCHET PONCHO PATTERN ON ETSY OR RAVELRY.
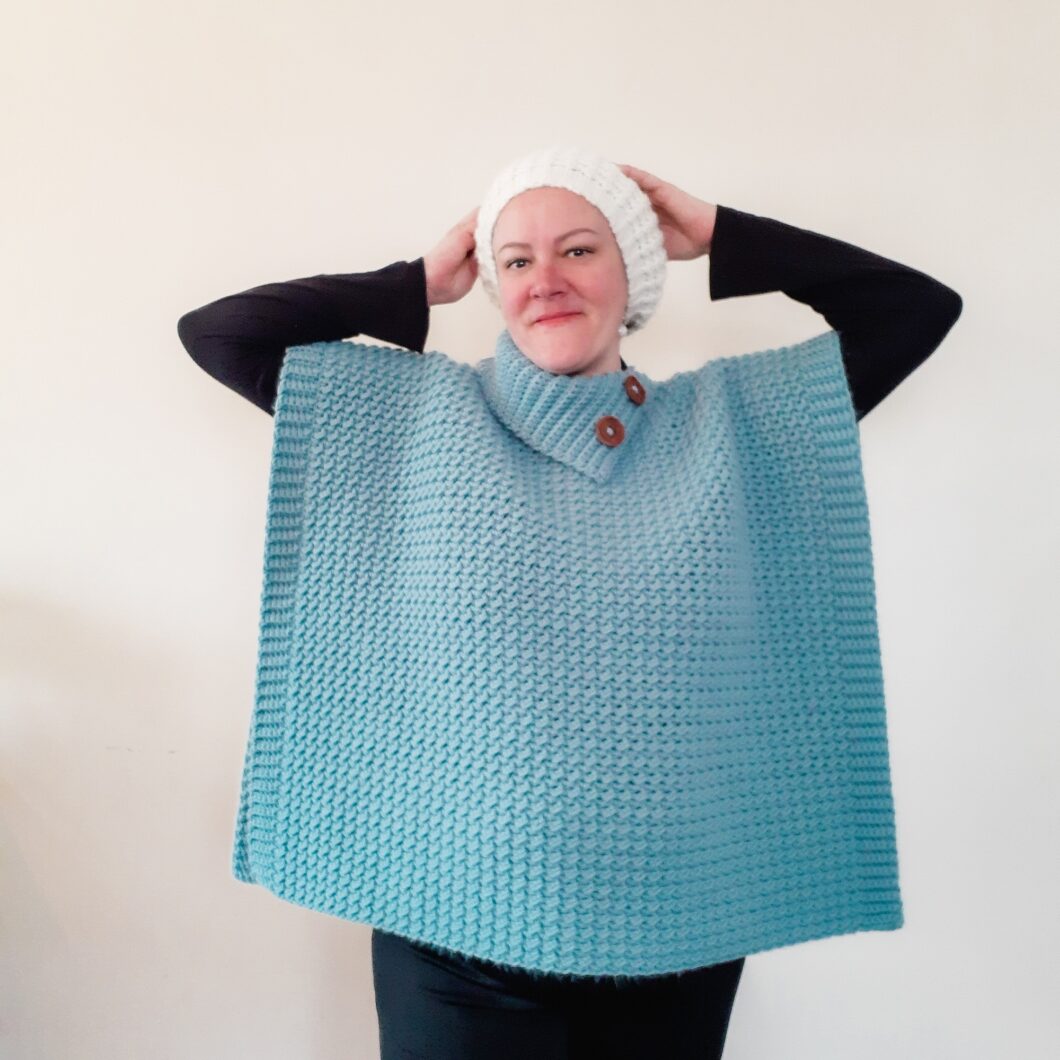
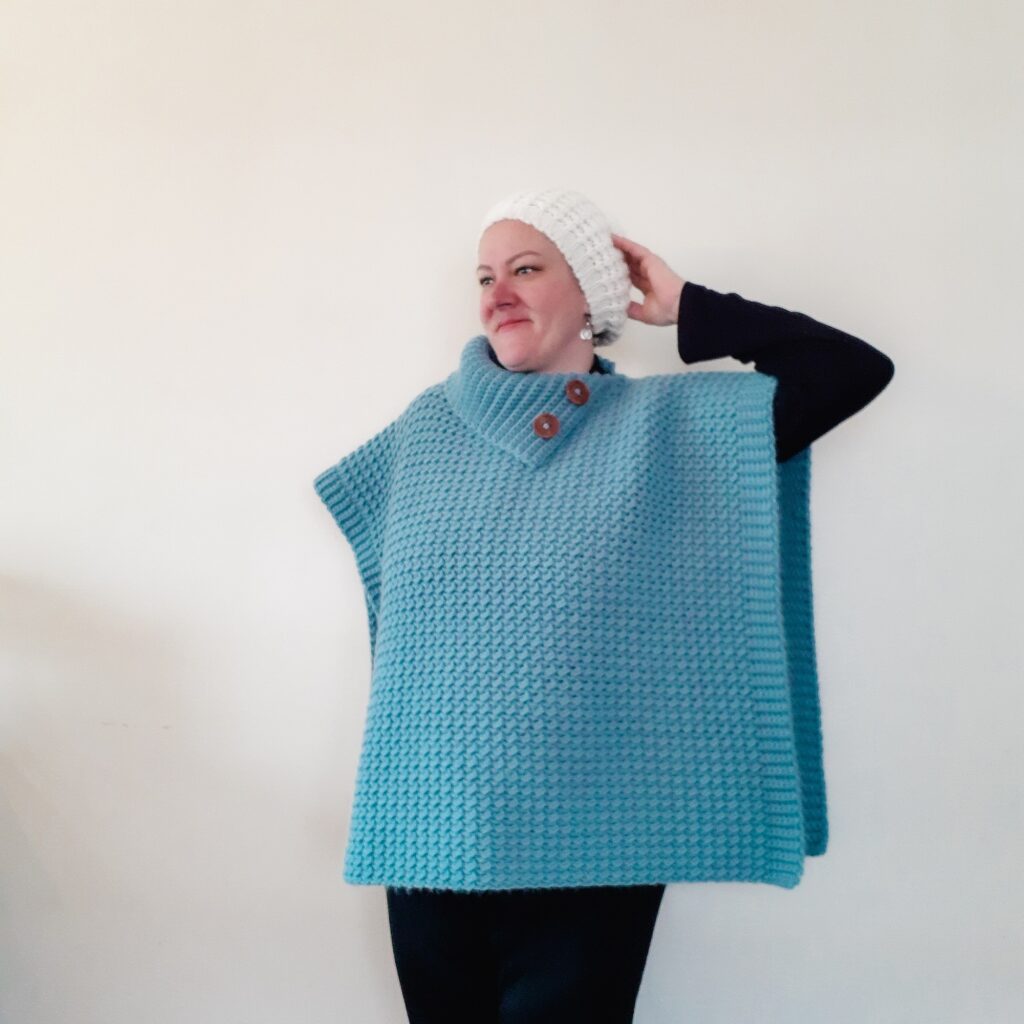
Spring is in the air and, while it’s still a bit chilly, it’s time for an amazingly adorbs crochet poncho pattern like this Chinook Pullover Poncho!
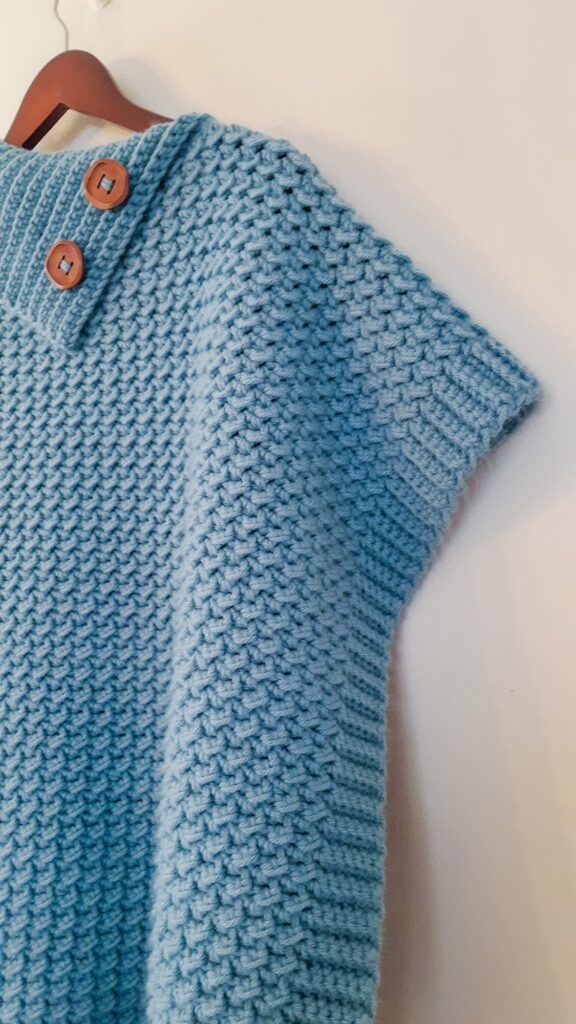
What I love about this piece is that it is all made in one continuous piece, with the spit turtleneck worked on at the end. It really couldn’t be more simple. Even the ribbed border on the sides is worked right in to the piece as you’re going along.
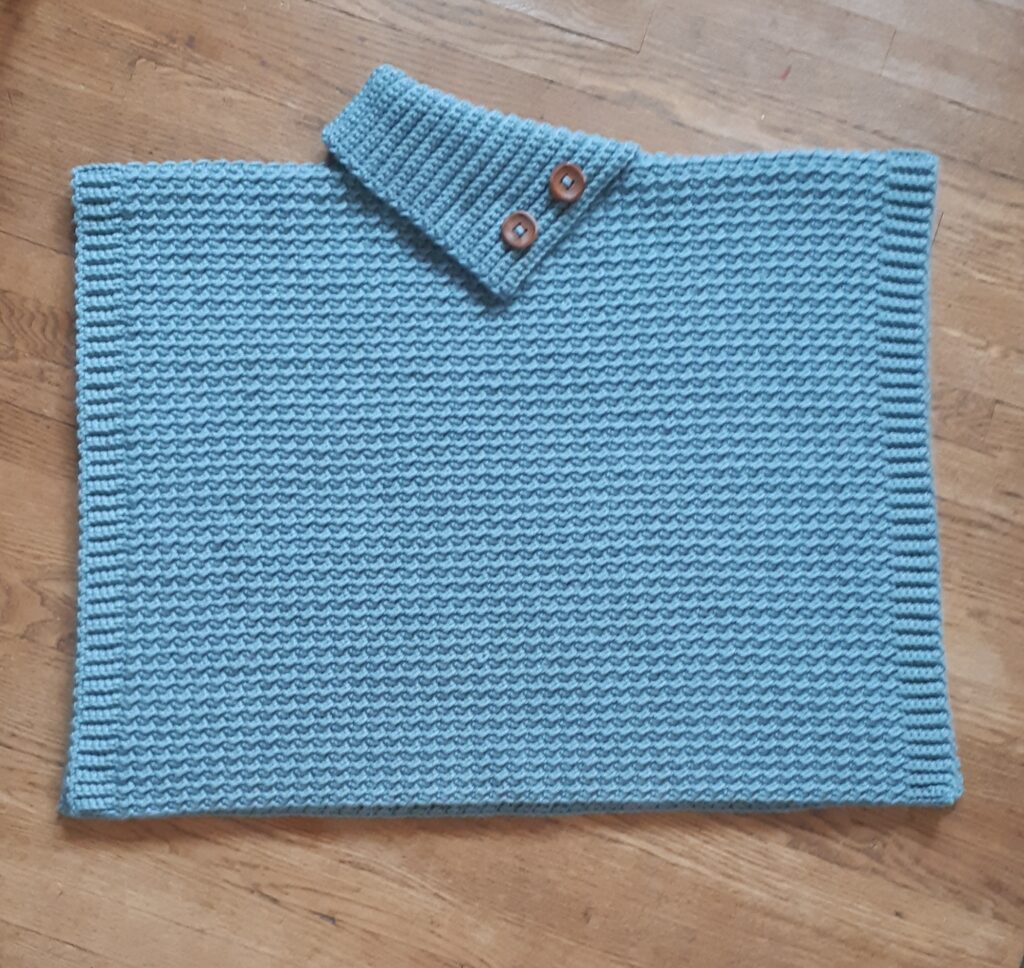
The texture of this piece crochet poncho pattern is created by the Even Moss Stitch, a stitch I personally love. Not only does it create gorgeous texture, but it’s so each AND it’s reversible too because it’s the same on both sides.
I used 2 skeins of Caron One Pound in a nice spring-like color, Azure. The Caron One Pound is great for big projects like this one and softens so nicely when laundered. While I did it in one solid color, I think stripes would also look amazing on a piece like this.
For more poncho patterns, take a look at the Beginner-Friendly Boho Poncho or the Crossover Poncho. For more patterns using Even Moss Stitch, see my Lightening Quick Glasses Case.
LET’S GET MAKING! Scroll down for the FREE pattern below OR you can PURCHASE the Ad-Free, printable version of this free crochet pattern from ETSY OR RAVELRY.
| SUPPLY LIST |
| 6 mm hook Any Category 4 cotton yarn (Used: Caron One Pound in Azure Blue) Approx yardage: XS/S/M: 1200 Y / 1100 M L/XL: 1625 Y / 1484 M 2XL/3XL: 2050 Y / 1875 M 4XL/5XL: 2500 Y / 2285 M 2 Large Buttons, Stitch Markers, Scissors & a Tapestry needle |
| STITCHES / ABBREVIATIONS |
| **All stitches are in North American terms** YO – yarn over CH – chain ST – stitch BB – back bump (of the foundation chain) SK ST – skip stitch SL ST – slip stitch HDC – half double crochet EMS – even moss stitch (alternating between SL ST & HDC) SCBLO – single crochet in the back loop only |
| SIZE |
| The sizes are grouped as follows: [XS/S/M] and [L/XL] and [2XL/3XL] and [4XL/5XL] |
| FINISHED MEASUREMENTS |
| [XS/S/M] 25” h x 27” w [L/XL] 25” h x 31” w [2XL/3XL] 25” h x 35” w [4XL/5XL] 25” h x 39” w Note: For the extra small, if you feel it’s still too wide, just shorten the row length in increments of 4 until you reach your desired width |
| GAUGE |
| 12 rows x 12 stitches = 4” x 4” of Even Moss Stitch |
| DIFFICULTY LEVEL |
| Intermediate |
| PATTERN AND SIZING NOTES |
| – This crochet poncho pattern is made as one piece from the front bottom up, over the shoulders and down the back. The turtleneck portion is added on at the end. – The stitch used here is the EVEN MOSS STITCH (EMS), with is just a continuous alternation between slip stitch and half double crochet. Please pay close attention to row descriptions of EMS to know whether you’re starting with a SL ST or an HDC depending on the row (see note below) – The ribbed side border is worked right in to the piece, it is not added at the end. – ODD row numbers will start and end with a half double crochet in between your ribbed side border stitches. EVEN row numbers will start and end with a slip stitch in between your ribbed side border stitches. – The split turtleneck portion is crocheted right on to the poncho perpendicular to the piece, but if you aren’t comfortable working perpendicular ribbing, you can create it as a separate piece and seam it on. – The length of this pullover poncho is customizable. If you want it longer, simply add an equal number of rows on the either side of the neck hole. – The crochet poncho pattern will be written for size [XS/S/M] with the remaining stitches written in parentheses after the first size. – Stitch count for each round will be indicated in parentheses ( ) at the end of the row. |
INSTRUCTIONS FOR THE “CHINOOK” PONCHO
Note: This crochet poncho pattern is written for XS/S/M and the parentheses after are for each subsequent size
CH 89 (101,113,125) + 1 to turn
Row 1: Starting with the 2nd BB from the hook, SC in the BB of the first 6 ST’s of the starting chain, then do EMS in the BB of the starting chain for 77 (89,101,113) ST’s starting with HDC, then to SC in the last 6 ST’s of the starting chain. CH 1 & turn (89/101/113/125)
Row 2: SCLBO x 6, EMS starting with SL ST for 77 (89,101,113) ST’s, SCBLO x 6, CH 1 & turn (89/101/113/125)
Row 3: SCBLO x 6, EMS starting with HDC for 77 (89,101,113) ST’s, SCBLO x 5 & SC x 1 in the last ST, CH 1 & turn (89/101/113/125)
Row 4 to 85: repeat rows 2 & 3
Row 86: The neck hole goes in this row: SCBLO x 6, EMS starting with SL ST for 22 (28,34,40) ST’s, CH x 33 and SK ST’s x 33, EMS for 22 (28,34,40) more ST’s, SCBLO x 5 & SC x 1 in the last ST, CH 1 & turn (89/101113/125)
Row 87: SCBLO x 6, EMS starting with HDC for 77 (89,101,113) ST’s [[be sure to place your ST’s in the BB of the CH’s you did for the neck hole]], SCBLO x 5 & SC x 1 in the last ST, CH 1 & turn (89/101/113/125)
Row 88: SCLBO x 6, EMS starting with SL ST for 77 (89,101,113) ST’s, SCBLO x 5 & SC x 1 in the last ST, CH 1 & turn (89/101/113/125)
Row 89: SCBLO x 6 EMS starting with HDC for 77 (89,101,113) ST’s, SCBLO x 5 & SC x 1 in the last ST, CH 1 & turn (89/101/113/125)
Rows 90 to 171: repeat rows 88 & 89
Adding the turtleneck & buttons:
Once you have completed the main body of the crochet poncho, we will add the turtneck portion. You can seam this once it’s put on, to have a true turtleneck, or you can leave it as a split turtleneck as I have done here.
– Turn your poncho inside out so the WRONG side is facing out.
– At the side corner of the neck, tie on and CH 24 + 1 to turn (same number for all sizes)
– Starting in the 2nd BB from the hook, SC in the BB of the chain all the way down, SL ST in to the ST you tied on from and SL ST in to the next ST as well, then turn you work
– SCBLO all the way up this perpendicular to the piece, except the last ST which will be a SC through both loops
– Continue working up and down in SCBLO and SL ST’ing to the neck hole, until you’ve gone all the way around to where you started
– Sew on 2 decorative buttons at locations of your choosing.
Weave in all ends and VOILA, a stunning and stylish crochet poncho pattern that will look amazing in spring or fall and with any outfit!
