“CARLISLE” CROCHET CROSS-BODY BAG
PURCHASE THE AD-FREE PDF OF THIS CROCHET CROSS-BODY BAG PATTERN ON ETSY OR RAVELRY (or scroll down for the free pattern).
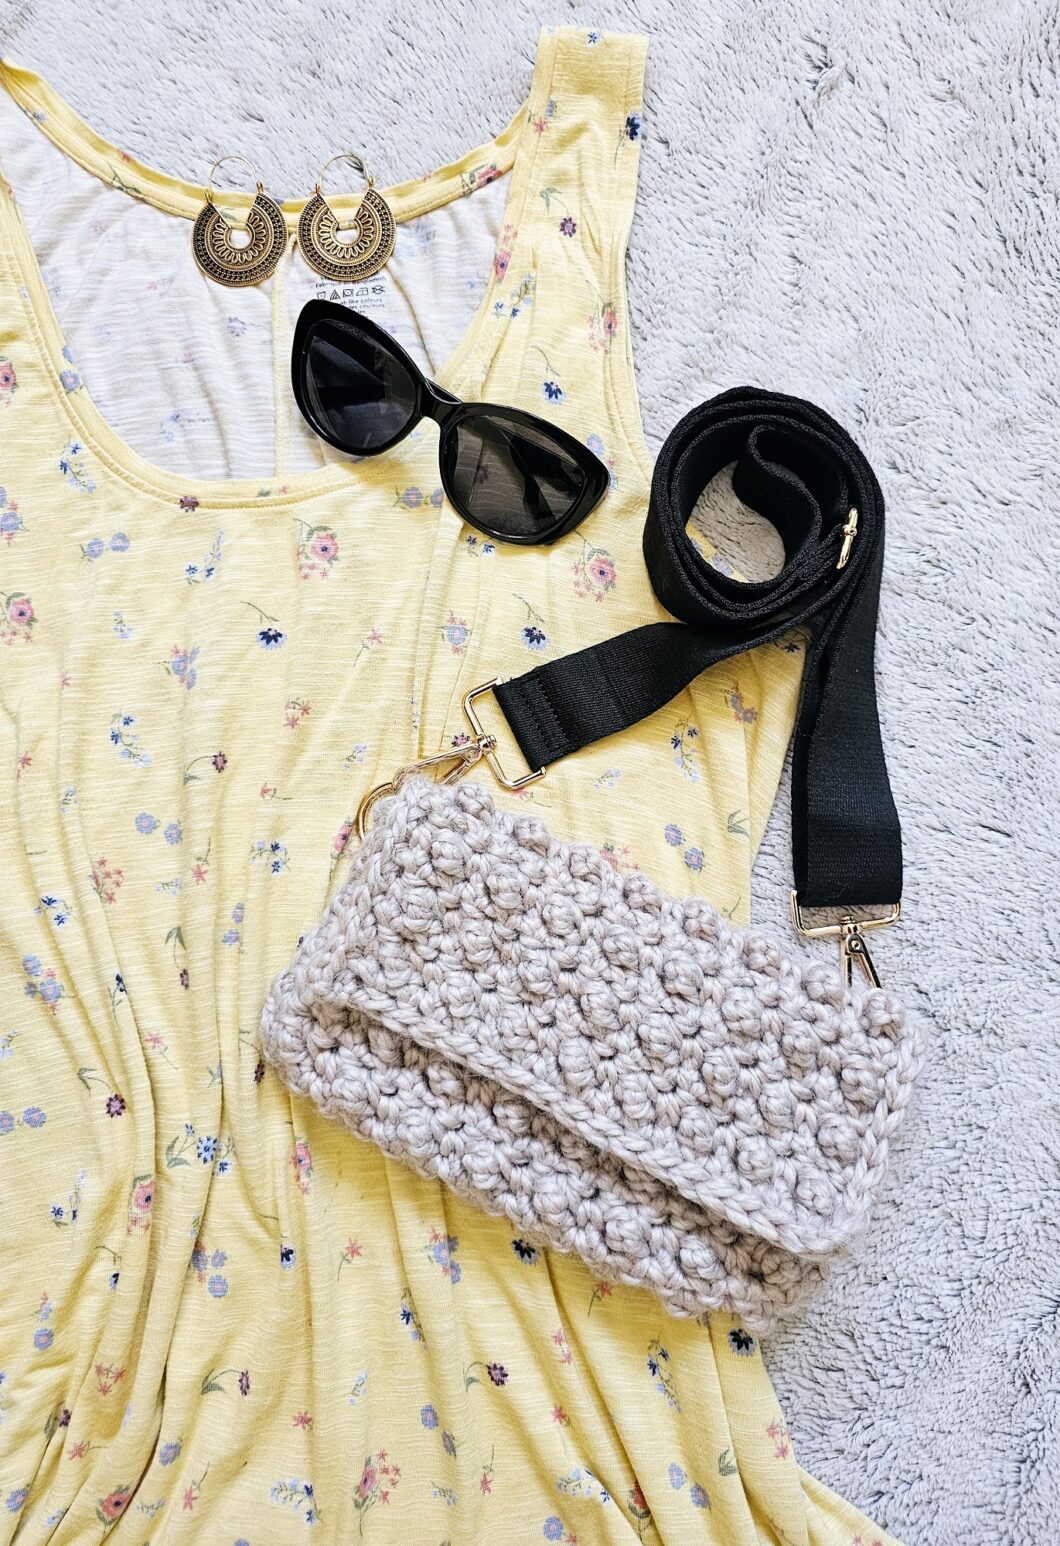
As summer vacation for the kids is about to be upon us, I wanted to create a crochet cross-body bag for full-day outings where I didn’t want a big, heavy bag and I found a great creation in the Carlisle Crochet Cross-Body Bag!
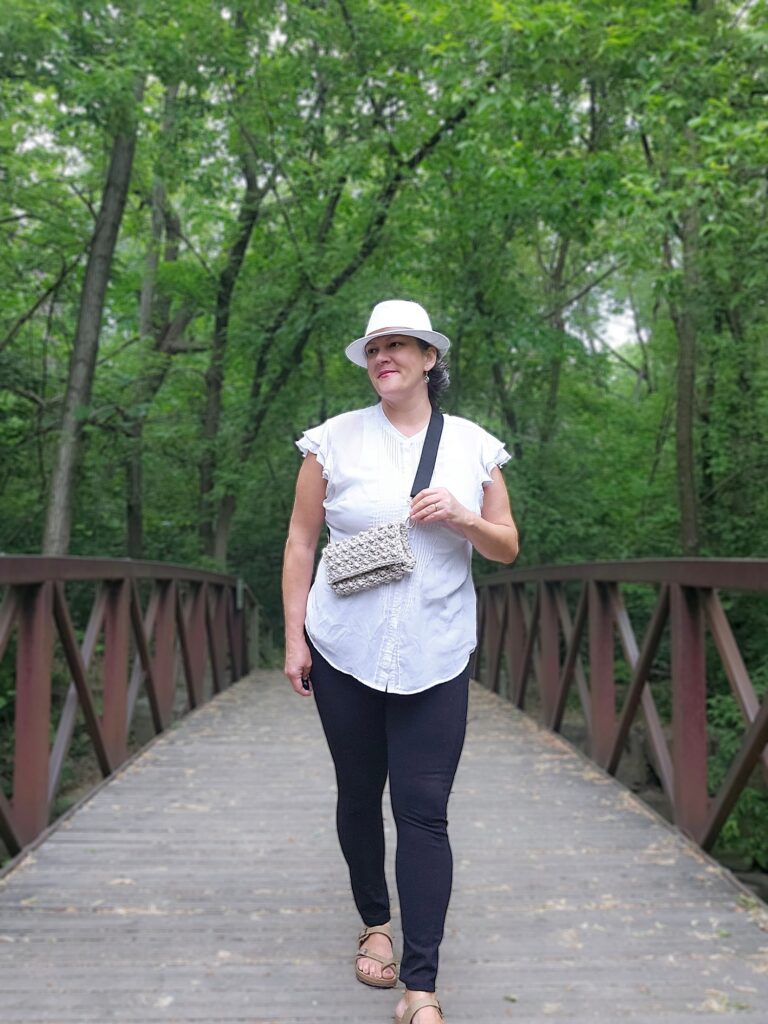
It is perfect for an all-day trip to the amusement park where I may bring a wagon to pull the kids, the drinks, the food and other accoutrements, but where I go on rides with them, I want to keep my wallet and phone close without worrying about the straps and safety mechanisms of the rides if I had a big bag. This bag sits close to the body and keeps the important things where I need them. It is also perfect for traveling when passports and other documents need to be close at hand.
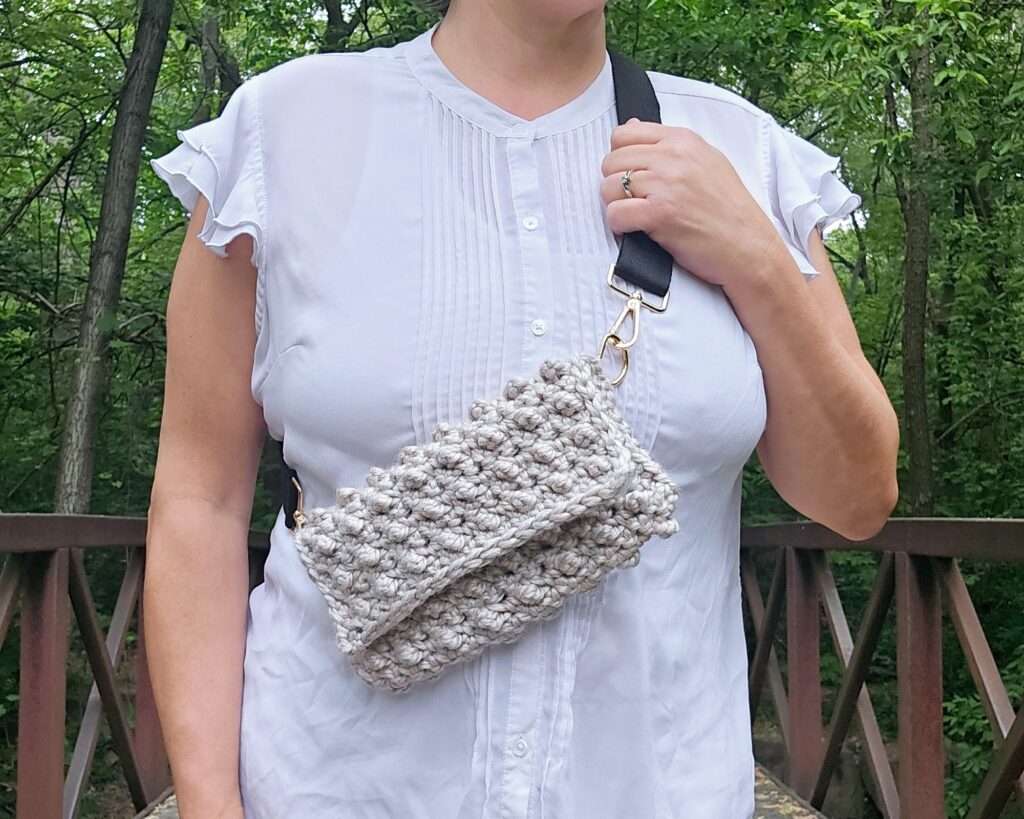
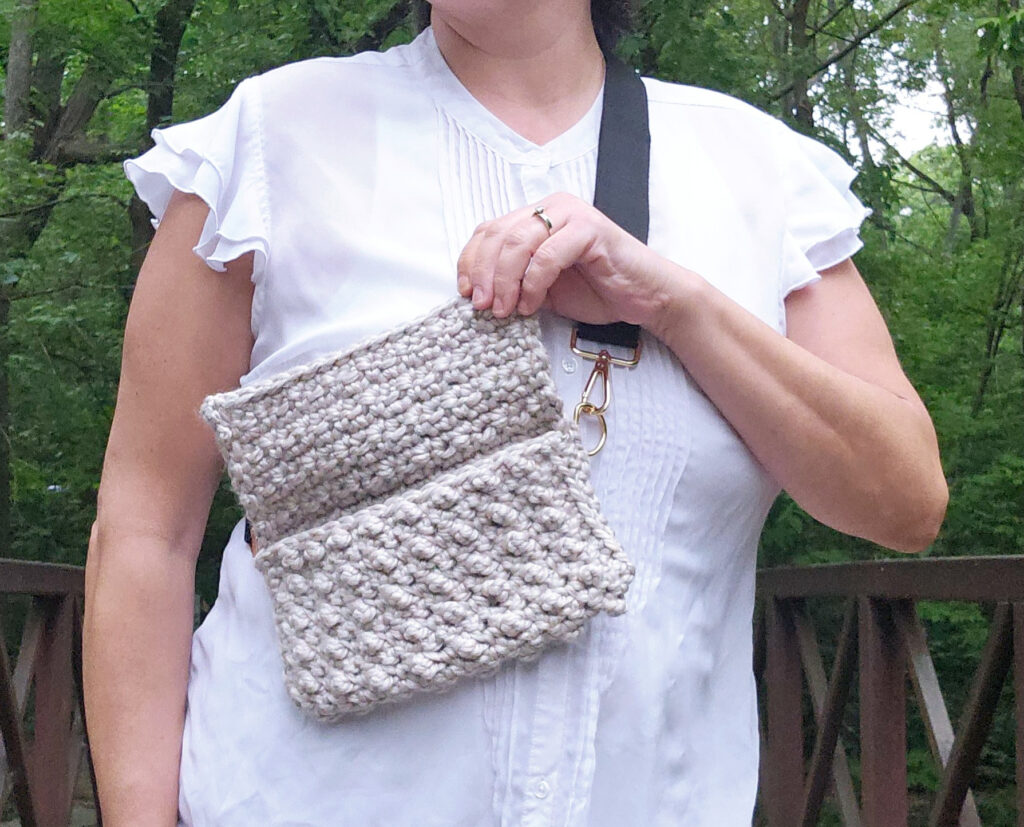
The construction of this crochet cross-body bag couldn’t be more simple and I made it in under 2 hours! It is made as a large rectangle then folded and seamed on the sides before attaching the rings and purse strap. I added amazing texture with the berry stitch (which I call faux-bobbles because they’re a more subtle pop-out than the bobble stitch) and the back is done flat in SC to keep it tight to the body.
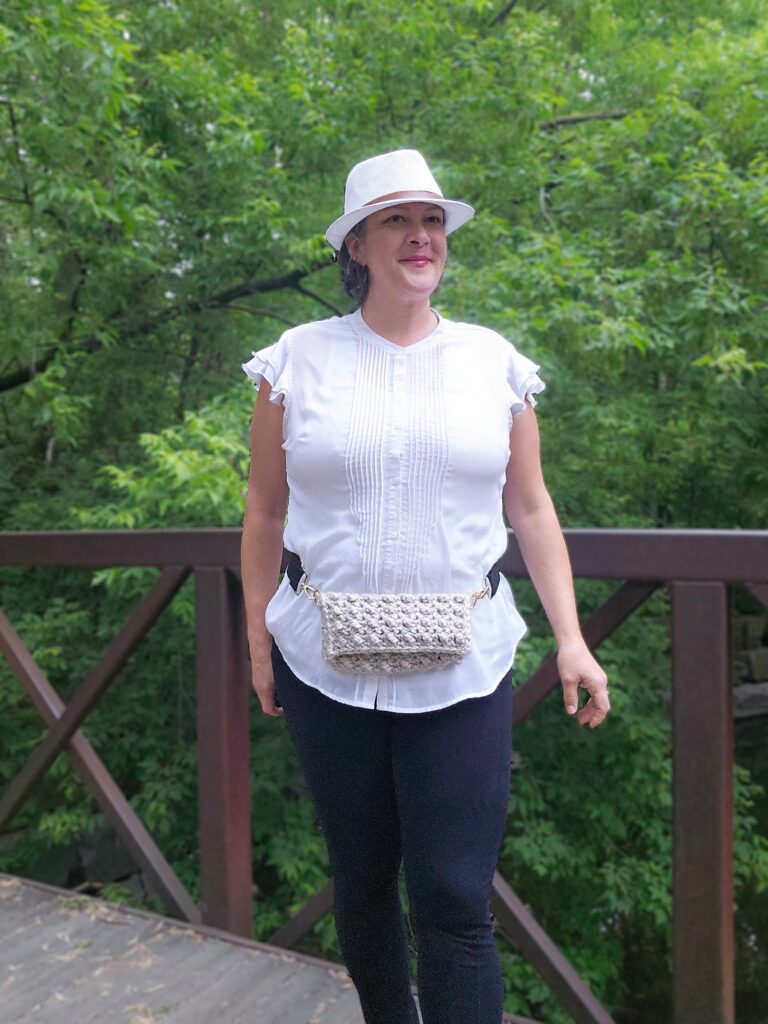
I didn’t add a magnet clasp on this version, but you certainly can! It’ll keep everything in it’s place. It can also be lined, if you like. The adjustable strap means I can create the length I want or even wear it around my waist like the old-school fanny pack.
I used Loops & Threads Cozy Wool, which is discontinued, but any Category 6 (Super Bulky) yarn will do, Or, you could use any size yarn you like and create your desired size and dimensions for a customized verions.
I hope you enjoy this bag and I can’t wait to use it on all our summer outings.
For more bag patterns, take a look at the Quick Crochet Tote, the Terra Crochet Tote Bag or the Solaris Oversized Tote.
LET’S GET MAKING! Scroll down for the FREE pattern below OR you can PURCHASE the Ad-Free, printable version of this free crochet pattern from ETSY OR RAVELRY.
| SUPPLY LIST |
| 8mm hook Any Category 6 (Super Bulky) yarn (Used: Loops & Threads Cozy Wool in Mushroom ** this yarn is discontinued, but any Cat 6 yarn will work) Approximate Yardage: 120 Y / 90 M 2 x D-rings or O-rings Adjustable purse strap of your choice Scissors Tapestry Needle |
| STITCHES / ABBREVIATIONS |
| **All stitches are in North American terms** YO – yarn over CH – chain BB – back bump ST – stitch SL ST – slip stitch SC – single crochet TC – triple crochet |
| SIZE |
| One Size |
| FINISHED MEASUREMENTS |
| 12” W x 8” H |
| GAUGE |
| Gauge is 8 stitches x 8 rows = 4” x 4” of alternating SC & TC |
| DIFFICULTY LEVEL |
| Advanced Beginner to Intermediate |
| PATTERN AND SIZING NOTES |
| – Must have knowledge of: working in the BB of the foundation chain, slip stitch, single crochet, triple crochet and seaming. – This crochet cross-body bag is made in one piece which is then folded and seamed on the side, then the D-rings and strap ate attached. – The texture is created by alternating SC and TC on the right side of the work. The SC after each TC must be tighter than normal to help the TC pop out for the faux-style bobble. – The textured faux-bobble portion is only present on the front of the bag and the bag is done flat in SC although you could continue the texture across the entire bag if you wish (I designed it flat to lie better against the body) – The CH 1 at the beginning of each row does NOT count as a stitch. – The stitch count is given in parentheses ( ) at the end of each row. |
INSTRUCTIONS:
Panel of the Carlisle Crochet Cross-Body Bag
CH 17 + 1 to turn
Row 1: Starting in the 2nd CH from the hook, alternate between SC and TC in the BB all the way across, ending on a SC in the last CH, CH 1 & turn (17)
Row 2: SC across the row, CH 1 & turn (17)
Row 3: Alternate between SC and TC across the row ending on a SC in the last ST, CH 1 & turn (17)
Row 4: SC across the row, CH 1 & turn (17)
Rows 5 through 11: Repeat rows 3 & 4 until you have completed 11 rows, CH 1 & turn (17)
Row 12 to 24: SC across the row, CH 1 & turn (17)
Row 25: Alternate between SC and TC across the row ending on a SC in the last ST, CH 1 & turn (17)
Row 26: SC across the row, CH 1 & turn (17)
Rows 27 to 32: Repeat rows 25 & 26 until you have completed 32 rows, CH 1 but do not turn (17)
Finishing round of the Carlisle Crochet Cross-Body Bag
With your CH 1 in hand, make sure the right side is facing you and SL ST all the way around the rectangle of the piece, making sure to place 3 SL ST’s in each corner stitch to turn the corner.
Assembly of the Carlisle Crochet Cross-Body Bag
– Fold your rectangle so that the faux-bobble portions are facing inward the wrong side is facing out. Using your tapestry needle seam up the sides of the purse. This should be approximately 11 ST’s with one stitch per row.
– Turn the crochet cross-body bag right side out.
– Using your tapestry needle, sew on your D-ring or O-ring at the the top of your seam. I suggest using about 8 or 10 stitches. Attach your adjustable strap. The top portion of the purse should hand anywhere between 1/2 to 2/3 of the way down the bag.
Weave in all ends and VOILA, you have the perfect crochet cross-body bag that will be great for all outings!
