“FAIRFIELD” CROCHET PONCHO
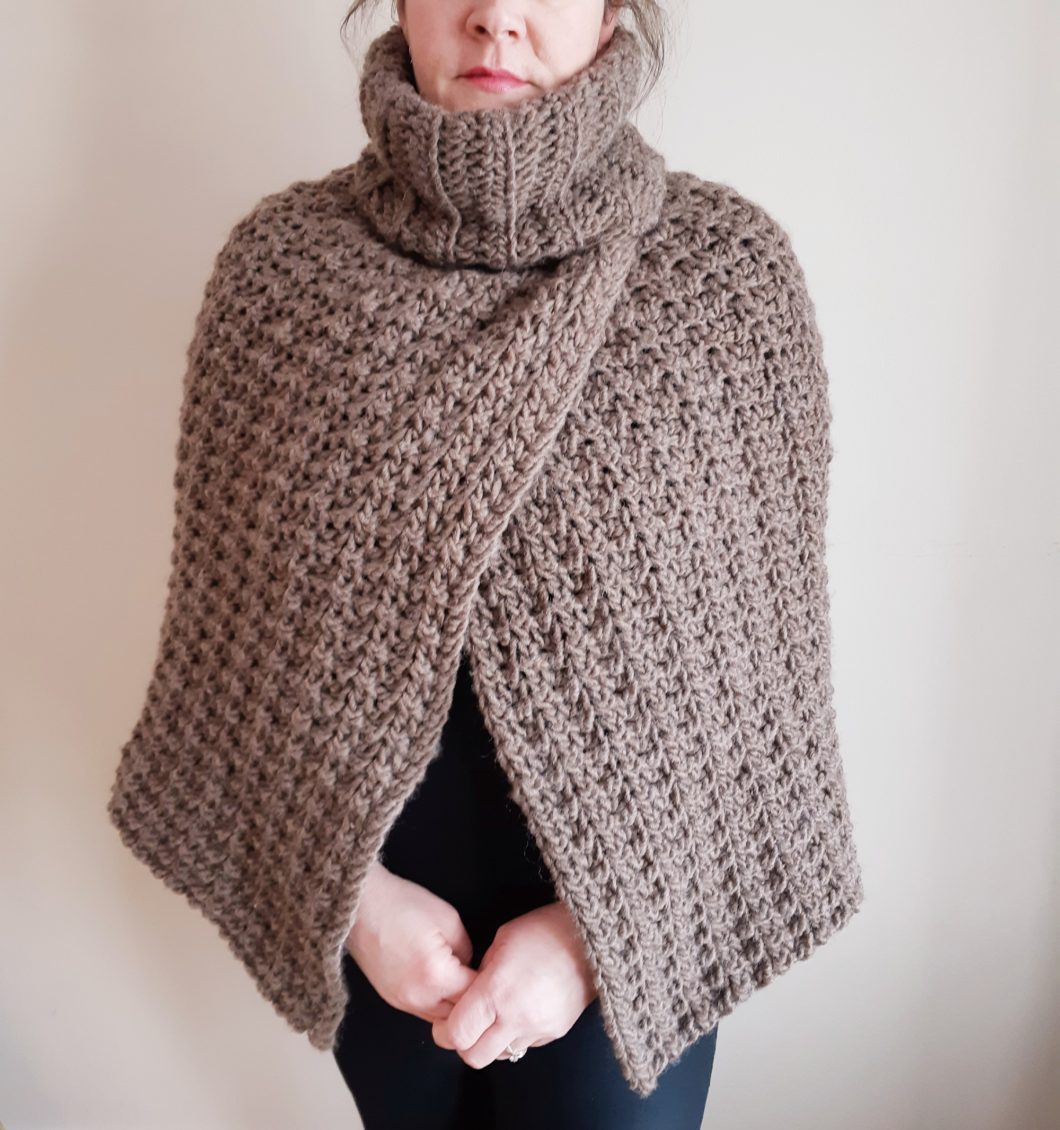
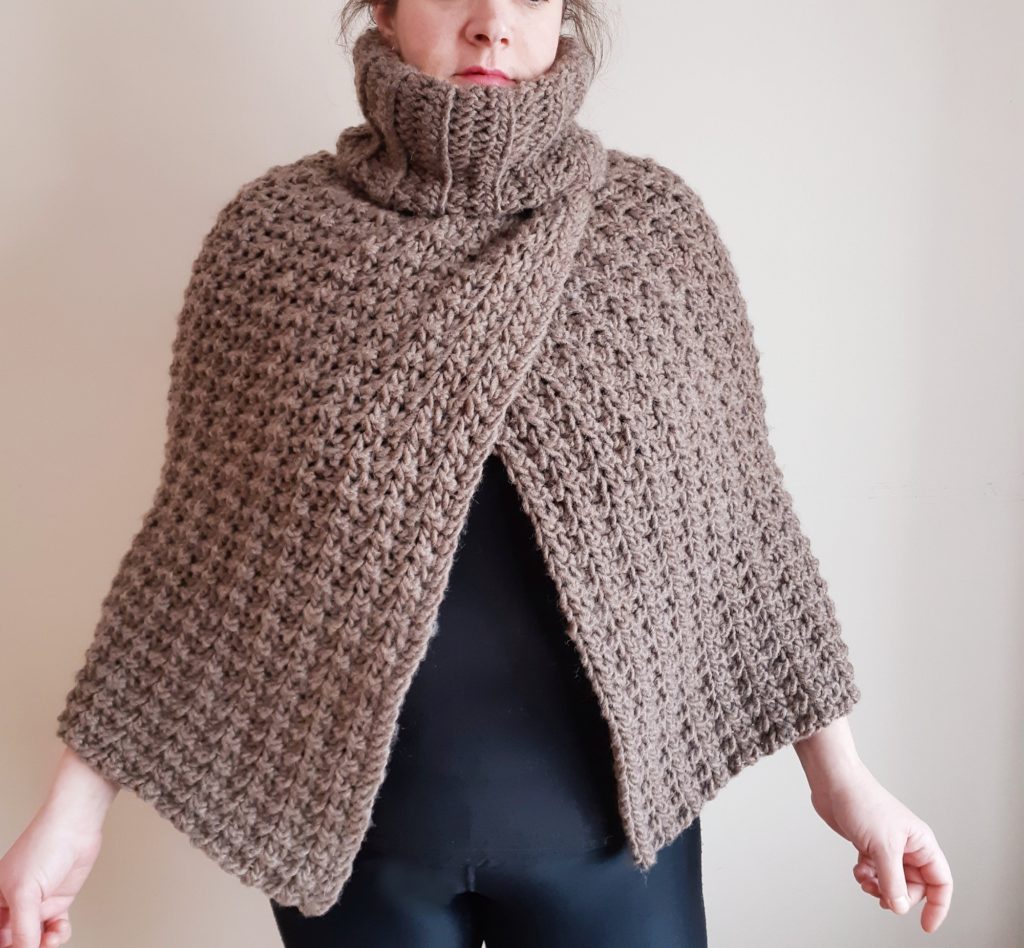
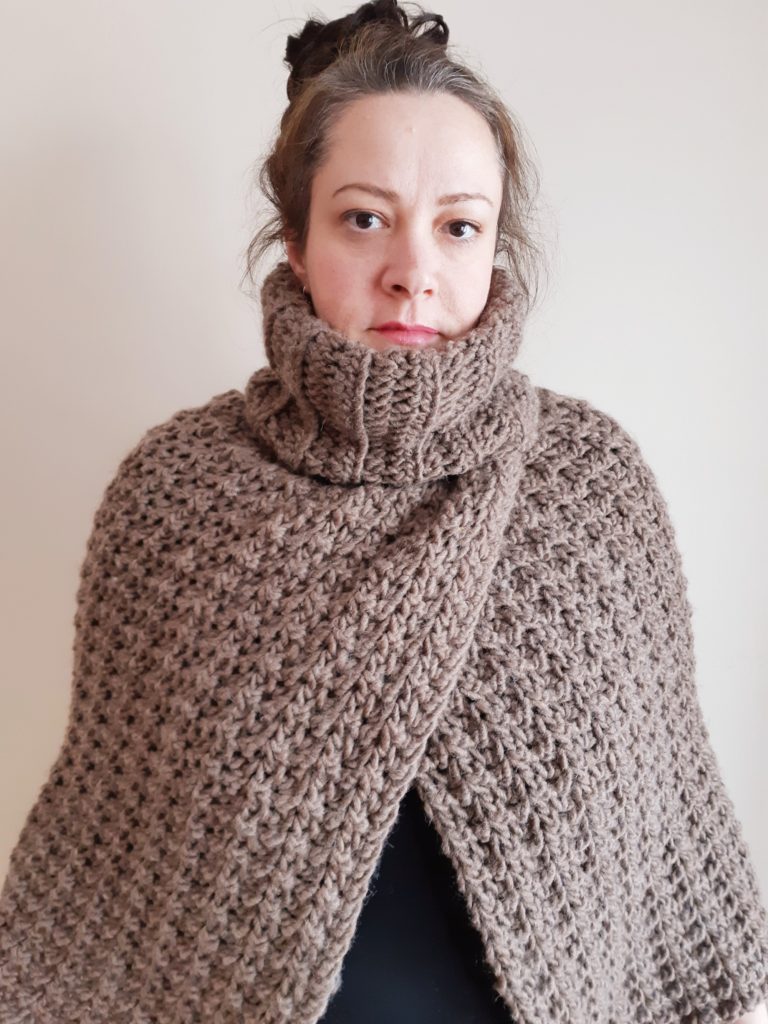
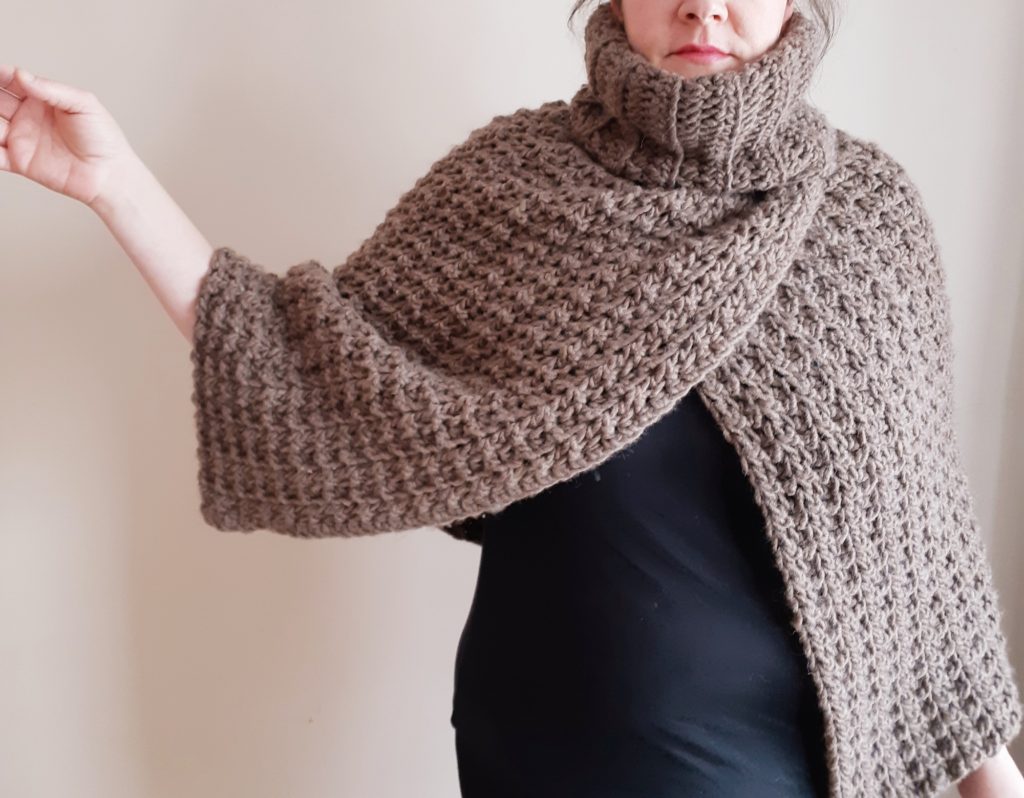
There’s nothing that says it’s the middle of winter like a super warm and squishy poncho with a turtleneck that hugs you!
I’ve been envisioning a poncho with crossed front panels for some time now and had been waiting until the inspiration hit. With our latest round of snow and some gorgeous soft roving yarn I recently got, the inspiration finally came to me.
I knew with this particular loose roving yarn and the clay-hued brown color, that I wanted a highly textured stitch to compliment both the yarn style and color. A half double crochet alternating between the back and front loops was just the texture I wanted to build. Creating the crochet poncho from side to side, like I did, I think the line running vertically also helps to slim such a bulky piece and streamline it a little bit.
I love the look of this Bernat Roving yarn so much. Even better, it’s so incredibly soft and pliable, but very delicate since it’s only 1 ply. And don’t even get me started on this beautiful, rustic color, I just love it! While this is the yarn I chose, it will work wonderfully in any 5 wt yarn and if you plan to wear and wash it a lot, then you’ll need to use a multiple-ply yarn that isn’t quite as delicate as this roving yarn.
This crochet poncho is made with two rectangles. The body of the poncho is worked as one long rectangle worked side to side. The turtleneck is the second rectangle and then the poncho is overlapped a bit at the 2 ends and the turtleneck affixed. It’s a really easy stitch, an easy assembly and an easy piece to wear and layer.
For more wearables patterns, take a look at the Robin Pullover Sweater, the Bonavista Crochet Capelet and the Beginner Crochet Poncho.
LET’S GET MAKING! Scroll down for the free pattern below OR you can get the Ad-Free, printable version from my Etsy store HERE
| SUPPLY LIST |
| 10 mm hook Any Category 5 yarn (Yarn Used: Bernat Roving in Bark) Approx yardage: 600 yards / 545 metres for S/M and 720 yards / 655 metres for L/XL Scissors Tapestry needle |
| STITCHES / ABBREVIATIONS |
| CH – chain ST – stitch SL ST – slip stitch SC – single crochet SC2tog – single crochet 2 stitches together in to one (decrease) HDCFLO – half double crochet in front loop only HDCBLO – half double crochet in back loop only |
| SIZES |
| One Size Fits Most, but I have provided patterns for 2 sizes: Small/Medium and for Large/XL |
| FINISHED MEASUREMENTS |
| S/M has width stretch to about 20” and is 19” in length from neck to bottom (not including turtleneck) L/XL has width stretch to about 25” and is 23.5” in length from neck to bottom (not including turtleneck) |
| GAUGE |
| 9 ST x 6 rows = 4” x 4” |
| DIFFICULTY LEVEL |
| Beginner |
| PATTERN AND SIZING NOTES |
| – This crochet poncho is made with a large rectangle crossed-over at the neck and then adding 2 rows with a small decrease to add the turtleneck portion. The turtleneck is a small rectangle seamed at the back and attached to the neck portion of the poncho – The stitch for the body of the poncho is a half double crochet, alternating each stitch in the back loop and the front loop, creating this beautiful texture. – Turning chain at the beginning of each row does NOT count as a stitch. – This is a very flexible pattern in terms of adjusting the length of the poncho and also the length of the turtleneck. See notes in the pattern for adjustment suggestions. – To wash/care instructions: If you’re using the yarn I use, please be aware this is a loose roving yarn and requires hand washing. Hand wash gently, gently remove as much water as possible, shape and lay flat to dry. |
INSTRUCTIONS —
SMALL / MEDIUM CROCHET PONCHO:
BODY OF CROCHET PONCHO:
S/M: CH 40 + 2 to turn
ROW 1: HDC in each ST across (40)
ROW 2 to 60: <HDCBLO, HDCFLO> and repeat < > to the end of the row, CH 2 and turn (40)
TURTLENECK:
(**I choose to do a close high turtleneck on my design, but you can easily customize with a shorter turtleneck by simply chaining 20 instead of 30 as below)
CH 30 + 2 to turn
ROW 1: HDC in each ST across (30)
ROW 2 to 27: HDCBLO in each ST across (30)
ASSEMBLY:
– Lay the body of the poncho right side down and fold each long side in so that the two ends overlap by 16 rows. Attach stitch markers if you like, to keep them attached and in place
– Attach your yarn in the approx. back middle of the neck portion of the poncho. You will now be working SC’s in the neck portion around what was the ‘side’ of your rectangle. Normally, you would work 3 stitches in to every 2 HDC rows, but in this case, we’re going to work 1 stitch in to each HDC row, keeping thos single crochet stitches quite long. Since we have 54 rows to work (16 overlapping on the 2 ends of the panel to equal the 70 rows), you will work 1 SC in to each of those rows around, making sure you have 54 SC’s. SL ST’ing back in to that first stitch (54 ST)
– CH 1 and SC2tog in each stitch around, then yarn over, pull through and tie off (27 ST)
– Lay your turtleneck rectangle wrong side down so the right side is facing you and fold the 2 long ends together.
– Whip stitch each ST together on down the side, tie off
– Do not turn the turtleneck right side out before affixing, we’re going to affix it inside out so that, when folded down, the ‘right’ side of the turtleneck folds down and is what we see
– Whip stitch the 27 rows of the turtleneck on to the 27 stitches in the neck portion of the poncho
Tie Off and weave in all your ends and Voila!
LARGE / XL CROCHET PONCHO:
BODY OF CROCHET PONCHO:
S/M: CH 50 + 2 to turn
ROW 1: HDC in each ST across (50)
ROW 2 to 70: <HDCBLO, HDCFLO> and repeat < > to the end of the row, CH 2 and turn (50)
TURTLENECK:
(**I choose to do a close high turtleneck on my design, but you can easily customize with a shorter turtleneck by simply chaining 20 instead of 30 as below)
CH 30 + 2 to turn
ROW 1: HDC in each ST across (30)
ROW 2 to 27: HDCBLO in each ST across (30)
ASSEMBLY:
– Lay the body of the poncho right side down and fold each long side in so that the two ends overlap by 16 rows. Attach stitch markers if you like, to keep them attached and in place
– Attach your yarn in the approx. back middle of the neck portion of the poncho. You will now be working SC’s in the neck portion around what was the ‘side’ of your rectangle. Normally, you would work 3 stitches in to every 2 HDC rows, but in this case, we’re going to work 1 stitch in to each HDC row, keeping thos single crochet stitches quite long. Since we have 54 rows to work (16 overlapping on the 2 ends of the panel to equal the 70 rows), you will work 1 SC in to each of those rows around, making sure you have 54 SC’s. SL ST’ing back in to that first stitch (54 ST)
– CH 1 and SC2tog in each stitch around, then yarn over, pull through and tie off (27 ST)
– Lay your turtleneck rectangle wrong side down so the right side is facing you and fold the 2 long ends together.
– Whip stitch each ST together on down the side, tie off
– Do not turn the turtleneck right side out before affixing, we’re going to affix it inside out so that, when folded down, the ‘right’ side of the turtleneck folds down and is what we see
– Whip stitch the 27 rows of the turtleneck on to the 27 stitches in the neck portion of the poncho
Tie Off and weave in all your ends and Voila! An unbelievably warm and cozy cross-over crochet poncho.