“ADELYN” CROCHET BATWING SWEATER
OR PURCHASE THE AD-FREE PDF OF THIS CROCHET BATWING SWEATER PATTERN ON ETSY OR RAVELRY OR LOVECRAFTS (or scroll down for the free pattern).
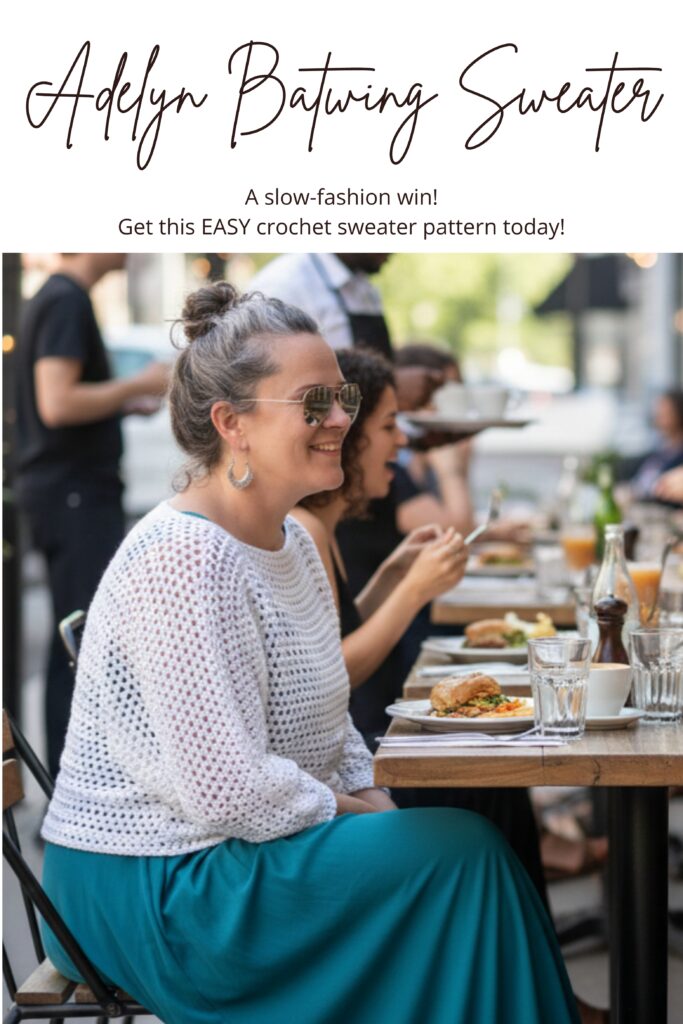
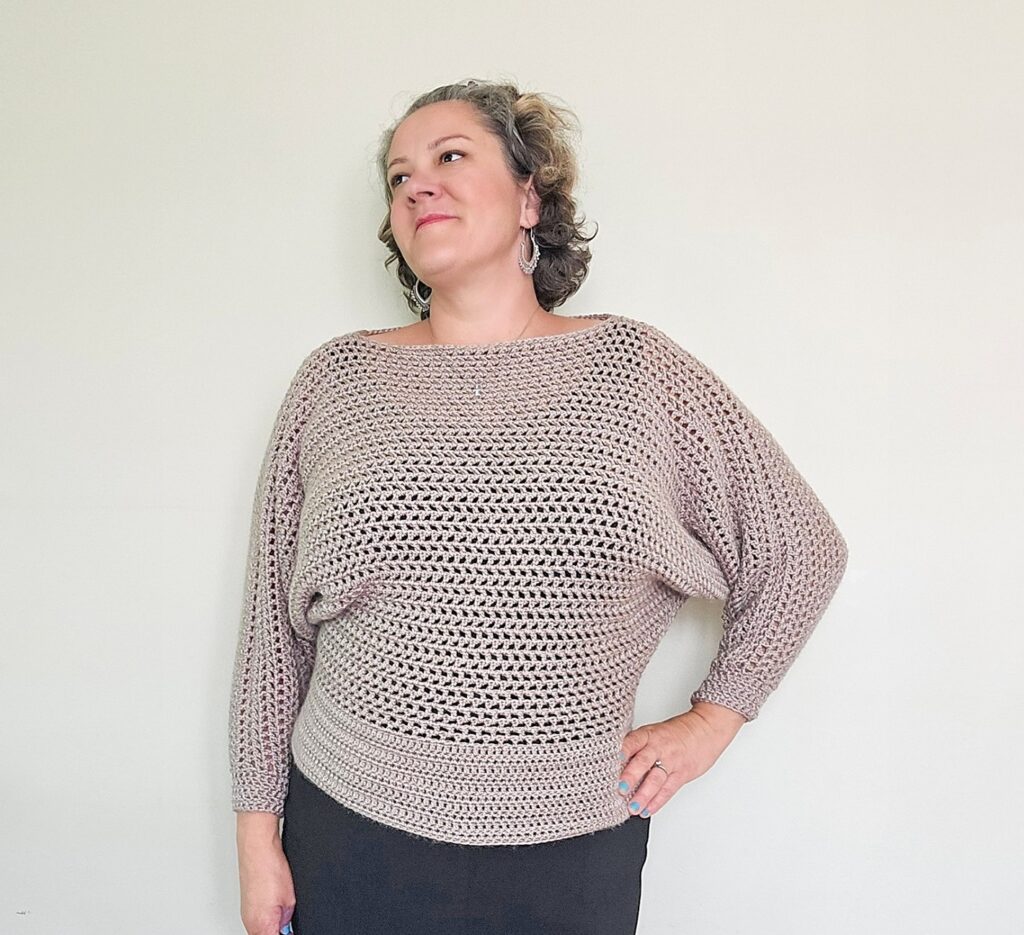
I simply adore this new Adelyn Crochet Batwing Sweater. The herringbone look of the mesh, the drape of the sleeves and the thick wasitband are to die for!
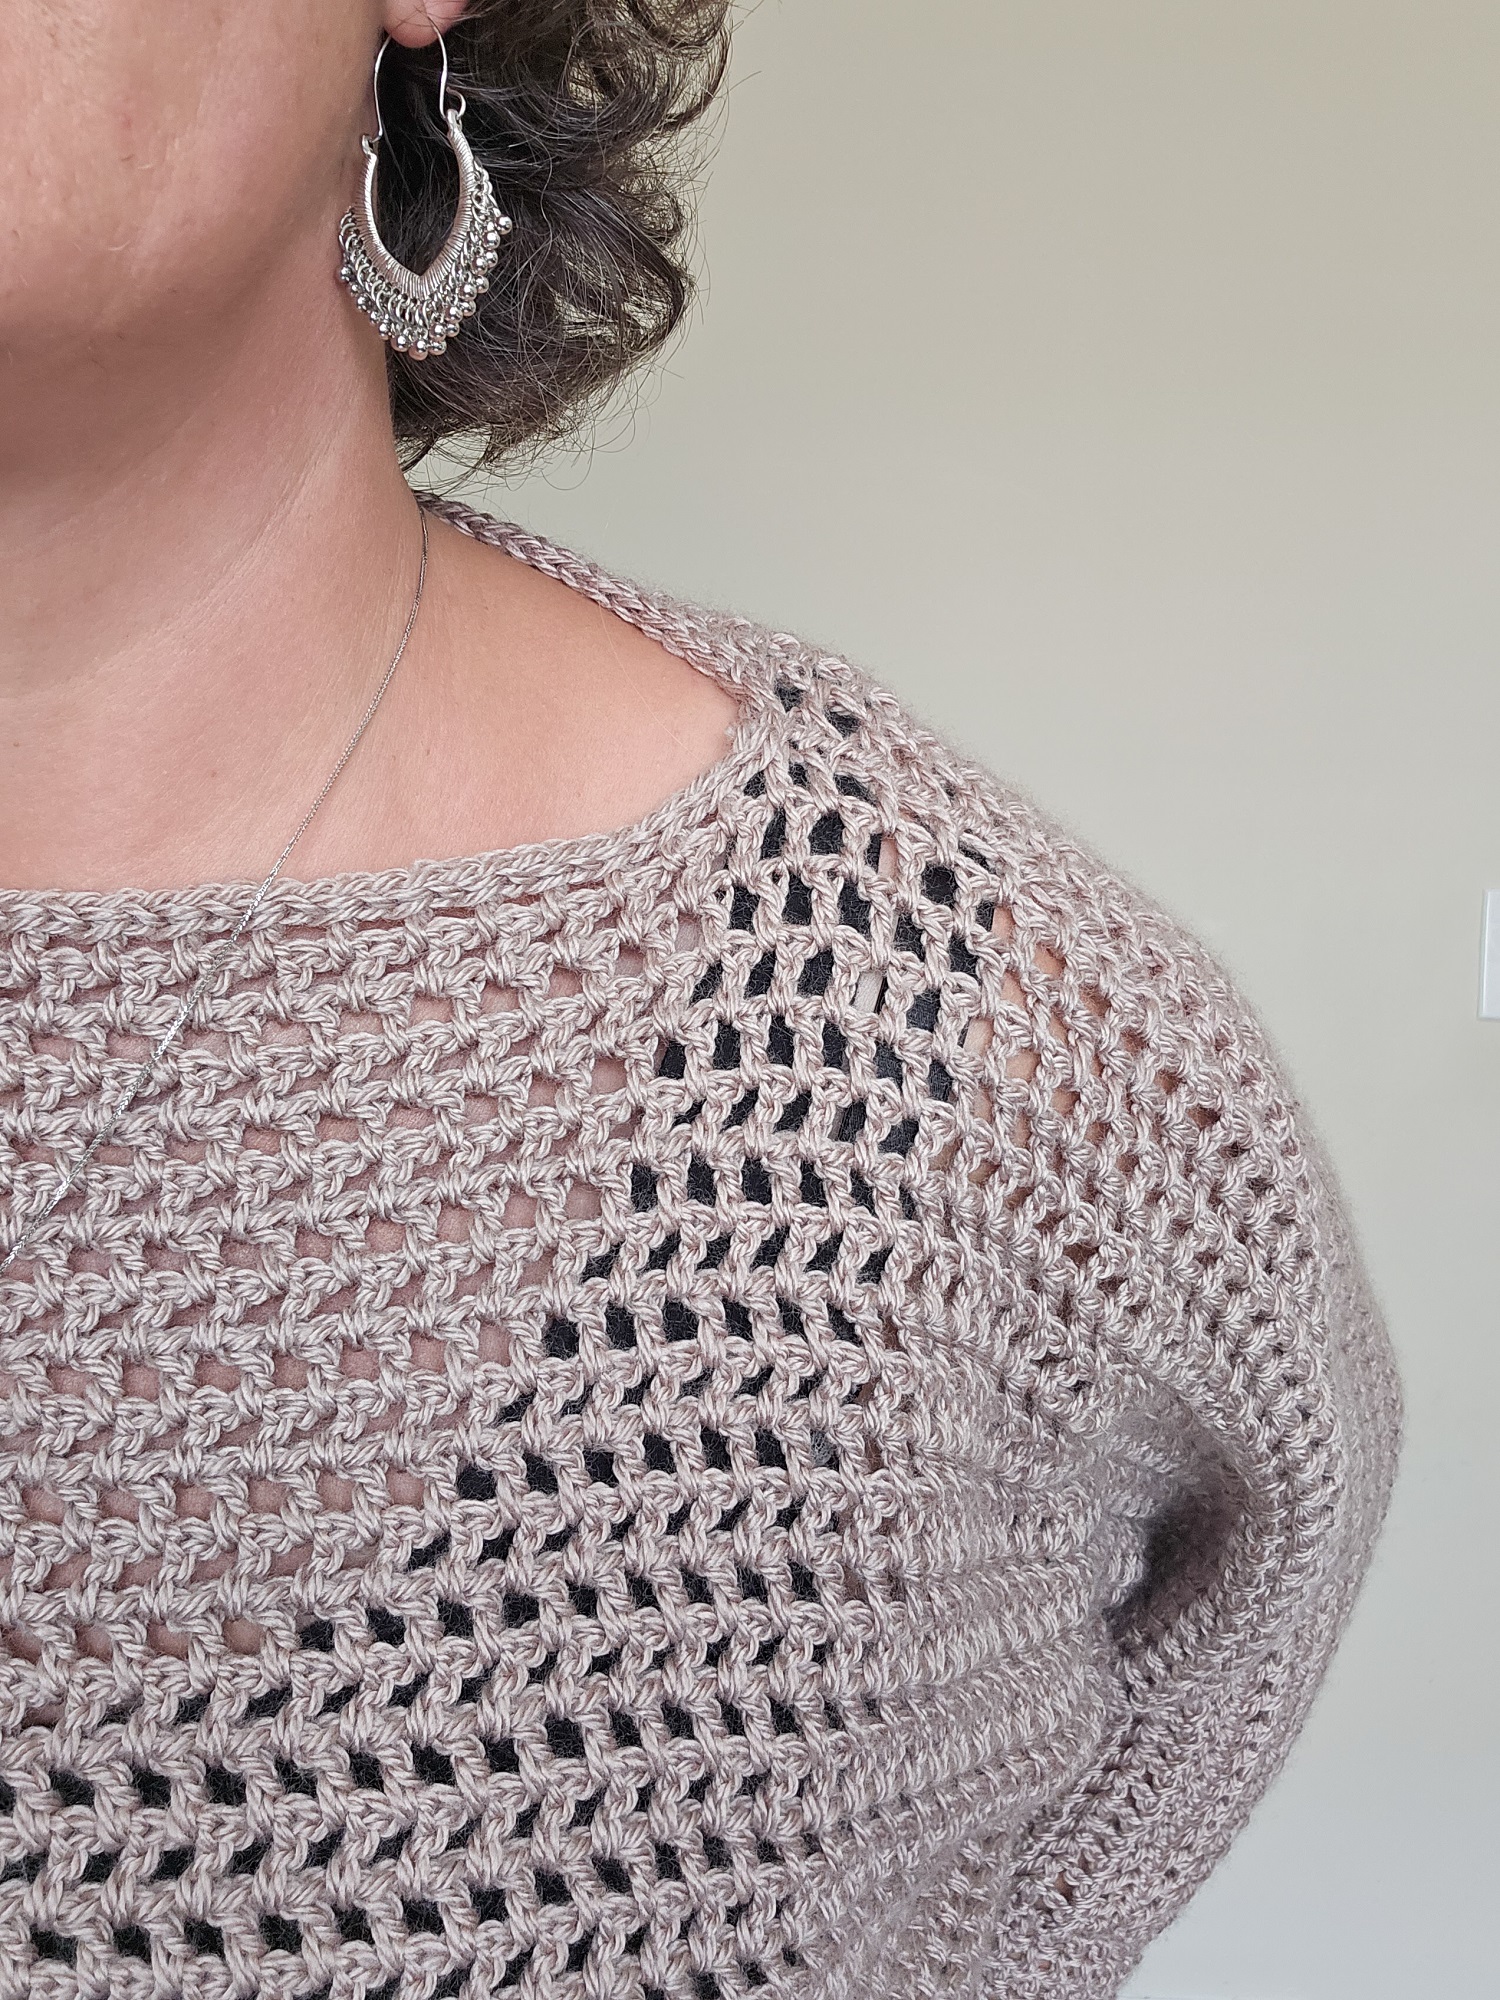
The yarn is Bernat Softee Baby in Little Mouse, which is a Category 3 yarn so it keeps the piece light and airy. The Double Crochet Moss Stitch used also keeps it airy with the lacey mesh. The mesh also allows this top to be a quick work-up.

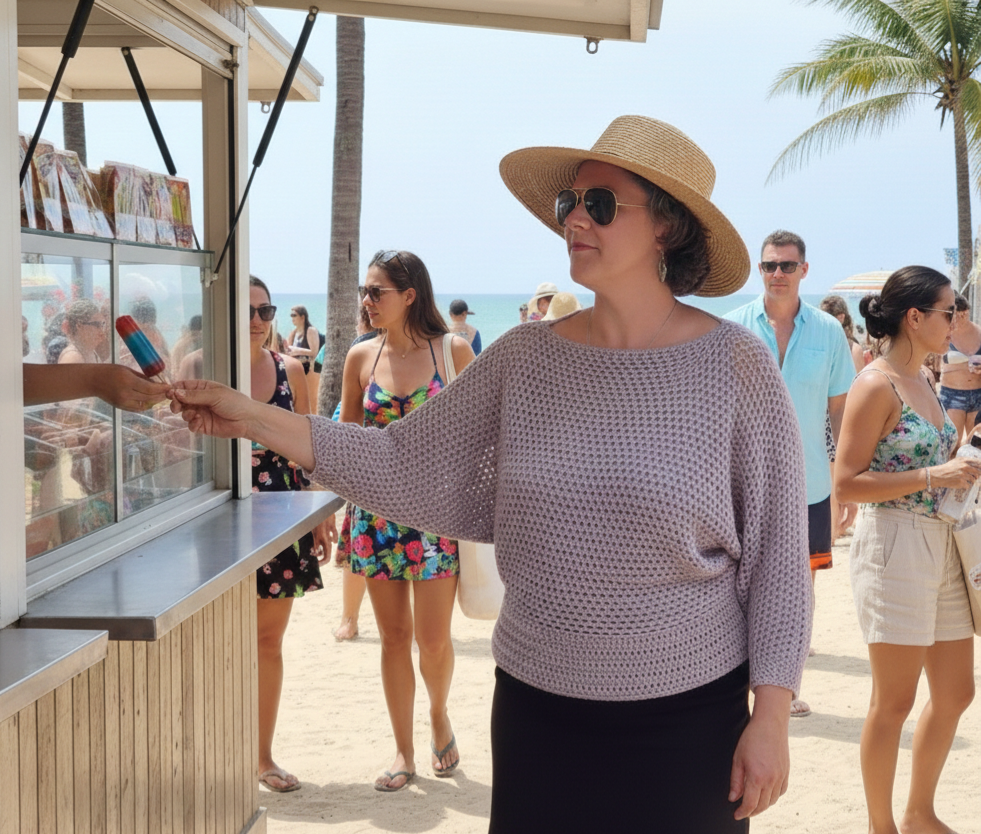
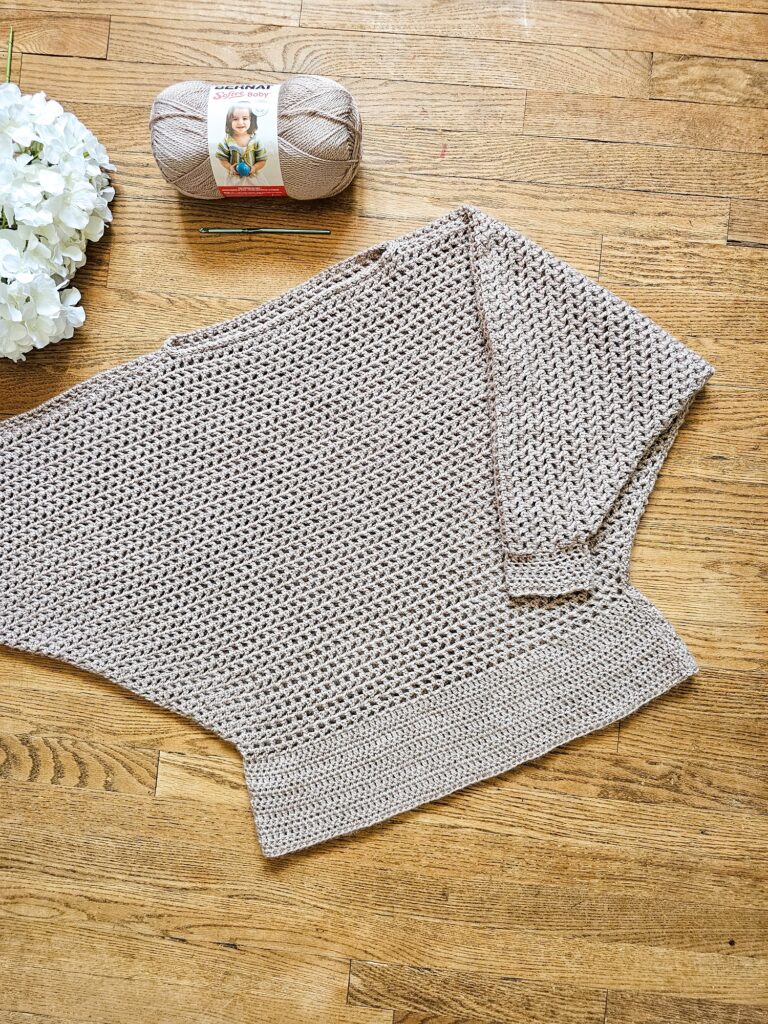
Construction of this mesh crochet top is two identical panels made from the bottom waistband up, using increases to widen the arms and creating the batwing style. The cuffs are added at the end, as well as a slip stitch round at the neck hole.
I hope you enjoy making this crochet batwing sweater as much as I did! For more sweaters take a look at the Meadow Pullover, the Robin Chunky Pullover and the Lindy Retro Top.
OR PURCHASE THE AD-FREE PDF OF THIS CROCHET BATWING SWEATER PATTERN ON ETSY OR RAVELRY OR LOVECRAFTS (or scroll down for the free pattern).
| SUPPLY LIST |
| 4mm hook Any Category 3 yarn (Used: Bernat Softee Baby in Little Mouse) Approximate Yardage: XS 650Y/594M, S 700Y/640M, M 800Y/731M, L 1000Y/914M, XL 1200Y/1097M, 2XL 1400/1280M, 3XL 1500Y/1371M, 4XL 1600Y/1463M, 5XL 1700Y/1555M Stitch Markers Scissors Tapestry Needle |
| STITCHES / ABBREVIATIONS |
| **All stitches are in North American terms** YO – yarn over CH – chain BB – back bump ST – stitch SK ST – skip stitch SL ST – slip stitch SC – single crochet DC – double crochet DCMS – double crochet Moss Stitch |
| SIZE |
| XS through 5XL |
| FINISHED MEASUREMENTS |
| ** This crochet batwing sweater is meant to be slightly form fitting around the waist band and the batwing style increases the width and is loose and flowy, so the measurement given below is for the waist band only. XS: 24” circumference S: 26.5” circumference M: 30” circumference L: 34” circumference XL: 38” circumference 2XL: 42” circumference 3XL: 45” circumference 4XL: 47” circumference 5XL: 50” circumference |
| GAUGE |
| Gauge for the waistband portion (in DC only) is 14 stitches x 9 rows = 4” x 4 Gauge for the body portion (in DCMS only) is 17 stitches x 10 rows – 4” x 4” |
| DIFFICULTY LEVEL |
| Intermediate |
| PATTERN AND SIZING NOTES |
| – For this crochet batwing sweater, you must have knowledge of: working in the BB of the foundation chain, slip stitch, skipping stitches, double crochet, double crochet Moss Stitch and increasing on both ends of a row. – This mesh crochet top is made in two identical panels and seamed at the shoulders and down the sides. The panels are worked from the bottom up. At the end, a small (optional) cuff is worked on to the end of each sleeve. – The double crochet Moss Stitch is just like the regular Moss Stitch (also knows as Linen Stitch or Granite Stitch) except, instead of using single crochet, you use double crochet. So you skip a stitch and chain 1, then place a DC in the next ST, then skip a stitch and chain 1 and place a DC in the next ST and continue this across the row. – The design if for a slightly short sleeve, just shy of wrist length, but you can create a longer cuff in the assembly portion if you like. – The pattern for this crochet batwing sweater is given for XS with all respective counts given in parentheses ( ) after the XS count. – Turning CH’s do NOT count as stitches. – To easily count your ST’s in a row to make sure you’re on track, just skip count by 2’s at each DC (not including the turning chain) – The stitch count is given in parentheses ( ) at the end of each row. |
**Instructions for the Adelyn Crochet Batwing Sweater **
Instructions are given in XS (S, M, L, XL, 2XL, 3XL, 4XL, 5XL)**
Front & Back Panels (make 2 identical):
CH 46 (50, 58, 66, 72, 74, 78, 82, 88) + 1 to turn
Waist Band
Waist Band Row 1: Starting in the 2nd CH from the hook, SC in the BB of each CH across the row, CH 3 & turn (46, 50, 58, 66, 72, 74, 78, 82, 88)
Waist Band Row 2: Starting in the 1st ST from the CH, DC in each ST across the row, CH 3 & turn (46, 50, 58, 66, 72, 74, 78, 82, 88)
Waist Band Rows 3 to 11: repeat Row 2 except at the end of Row 11, you will CH 4 & turn (46, 50, 58, 66, 72, 74, 78, 82, 88)
Main Body Row 1: Starting in the 2nd ST from the CH DCMS across the row the row ending on a DC in the last ST, CH 4 & turn (46, 50, 58, 66, 72, 74, 78, 82, 88)
** Here, begin increasing at both the start and end of each row to create the batwing sleeve **
Main Body Row 2: Starting in the 2nd ST from the CH, Place a DC in the first CH space, CH 1, then place another DC in that same CH space for an increase, then DCMS across the row except in the last CH space place a DC, CH 1 then place another DC in that same CH space for an increase, CH 4 & turn (50, 54, 62, 70, 76, 78, 82, 86, 92)
** We will repeat Main Body Row to for the following number of rows corresponding to size **
For Sizes XS & S repeat to Main Body Row 2 until 34 rows (XS 178 STs/row, S 182 STs/row)
For Size M & L repeat Main Body Row 2 until 36 rows (M 198 STs/row, L 206 STs/row)
For Size XL repeat Main Body Row 2 until 38 rows (XL 220 STs/row)
For Sizes 2XL, 3XL, 4XL 5XL repeat Main Body Row 2 until 40 rows (2XL 230 STs/row, 3XL 234 STs/row, 4XL 238 STs/row, 5XL 244 STs/row)
** Here, stop increasing at the start and end of rows, no increases from here to the end of the panel **
Arms Row 1 to 10: Repeat Main Body Row 1 for 10 rows (178, 182, 198, 206, 220, 2230, 234, 238, 244)
YO and tie off.
Adelyn Crochet Batwing Sweater – Assembly
– Place both panels together with the right sides facing in to each other and the wrong sides facing out.
– Using a seaming stitch of your choice, join the sides of the crochet batwing sweater from the bottom of the waistband to the row your increases stopped. The last 10 rows remain open as the arm hole for your sleeve. Repeat this on both sides.
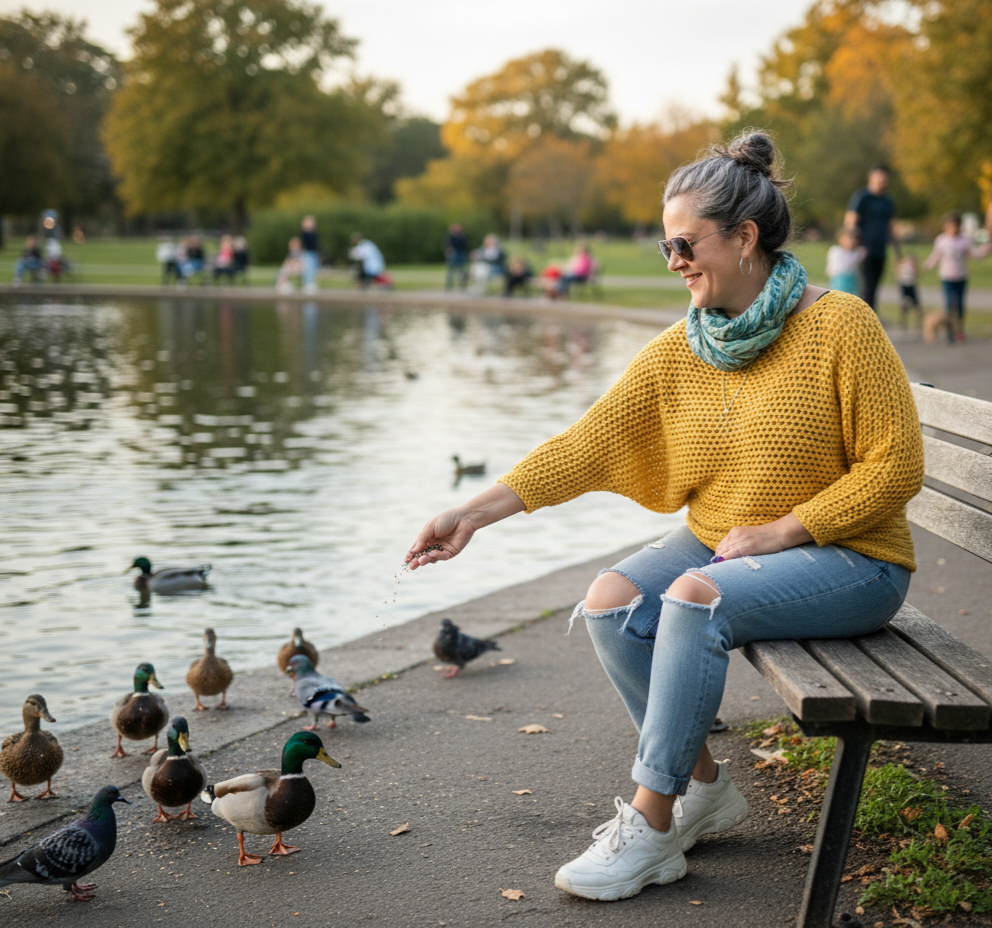
– Using a seaming stitch of your choice, join the top of the sleeves to the shoulders leaving an appropriate number of ST’s open for the neck hole (I will leave this up to your discretion but for the XL version I wear in the photos, I left a neck hole of 48 ST’s each panel, so for the smaller sizes you will want to make that 8 or 10 ST’s smaller, but from XL up, I think 48 is still an appropriate neck hole size).
– Tie on to the bottom seam on each arm hole, CH 3, starting in that same ST as your CH 3 DC in each ST and CH space for the round. You can add a few extra ST’s in the seams if you feel the cuff will be too tight. You can either SL ST to join and turn your work or you can create it as a flat piece and seam it afterward (In my version, I SL ST’d to join). Repeat rows of DC for 5 rows (or about 2 to 4 additional rows if you want a longer cuff).
– To finish the neck line a little, tie on in one of the shoulder seams and do very loose SL ST’s in each ST and CH space around.
Weave in all ends and VOILA, a stylish, light and airy crochet batwing sweater you will want to wear all the time!