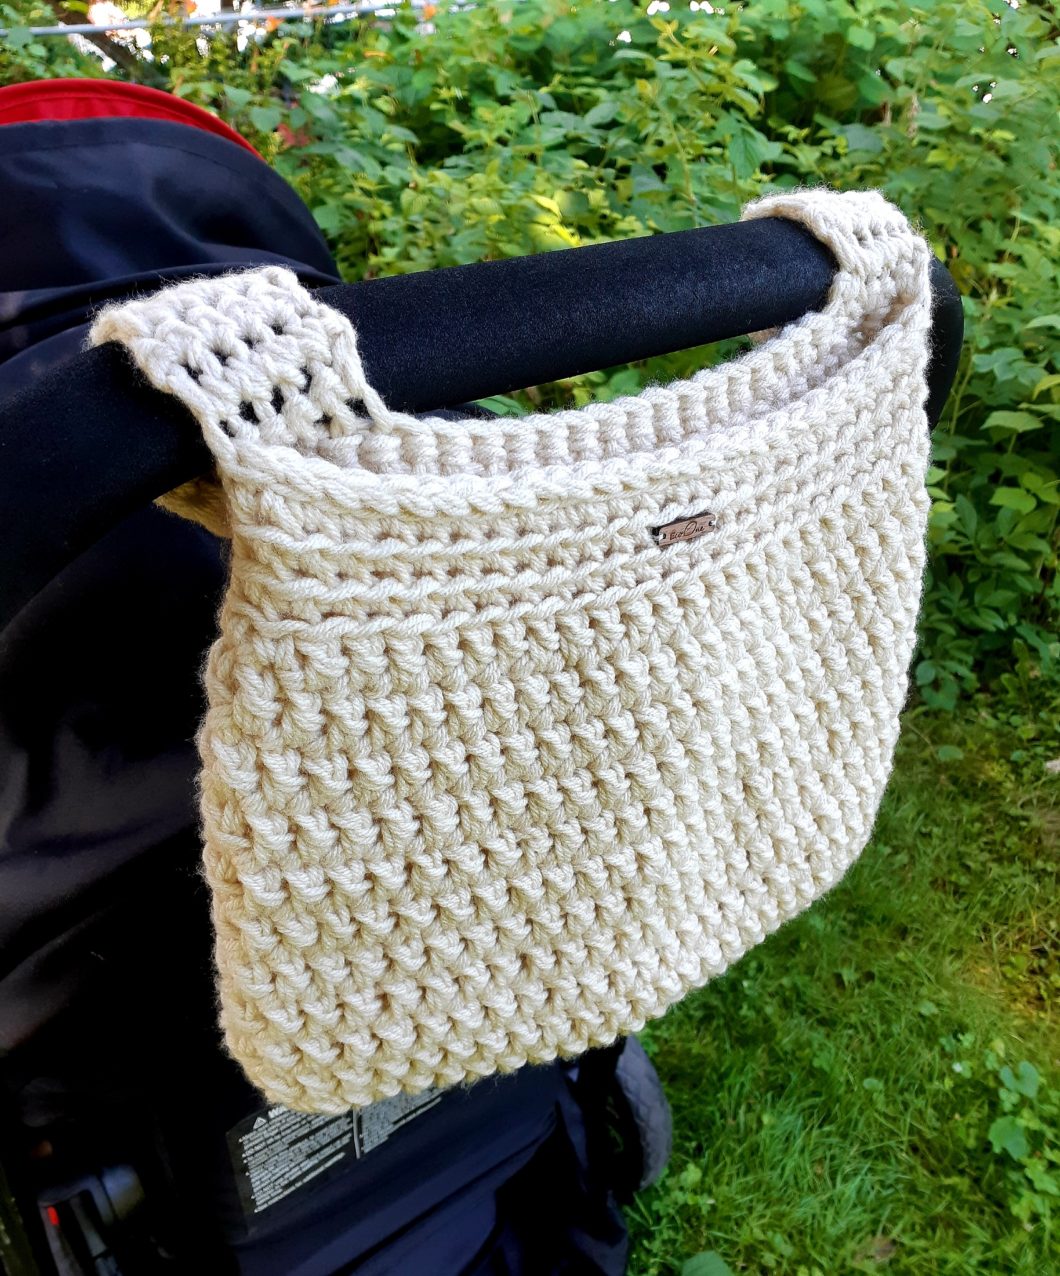
Today’s pattern is for the parent on the go – a Crochet Stroller Pouch (or for your cribs, desk chairs, wheelchairs etc).
I hope the end of your summer has been wonderful. It’s been a season full of fun and outings with our little ones and it has been made much easier by having this versatile crochet pouch on the stroller.
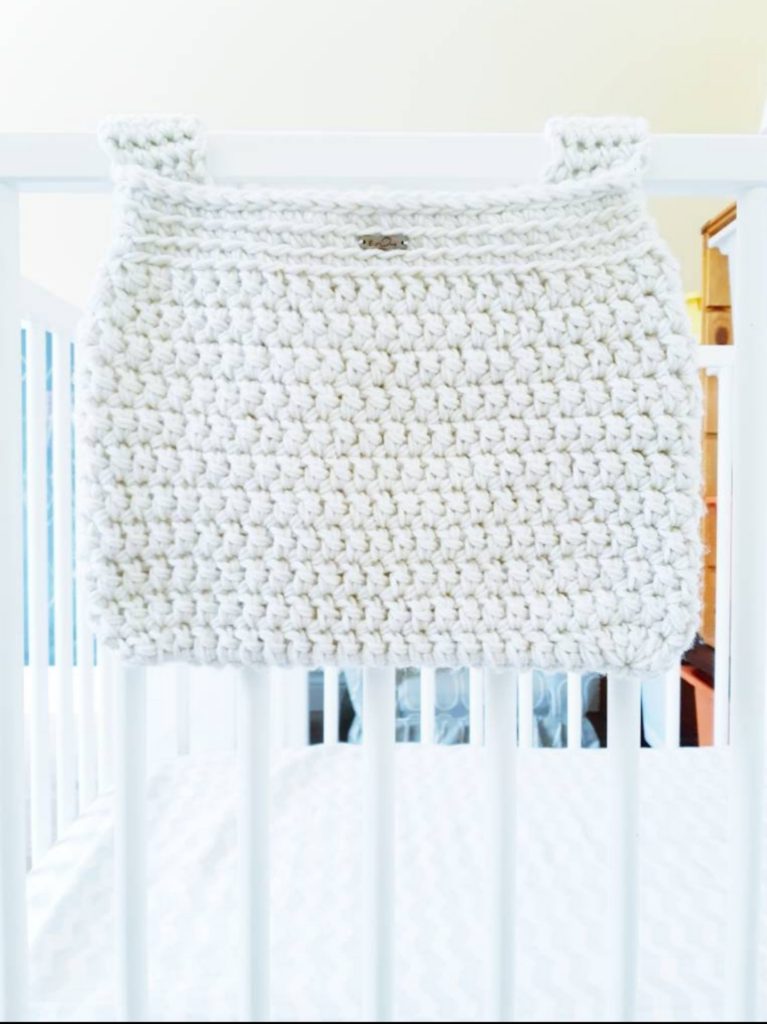
When I first published the first Crib Hanging Basket, I mentioned that I also had a rectangular pouch that I had made up (but had yet to publish the pattern for) and this is it. And it does double or even triple duty when needed.
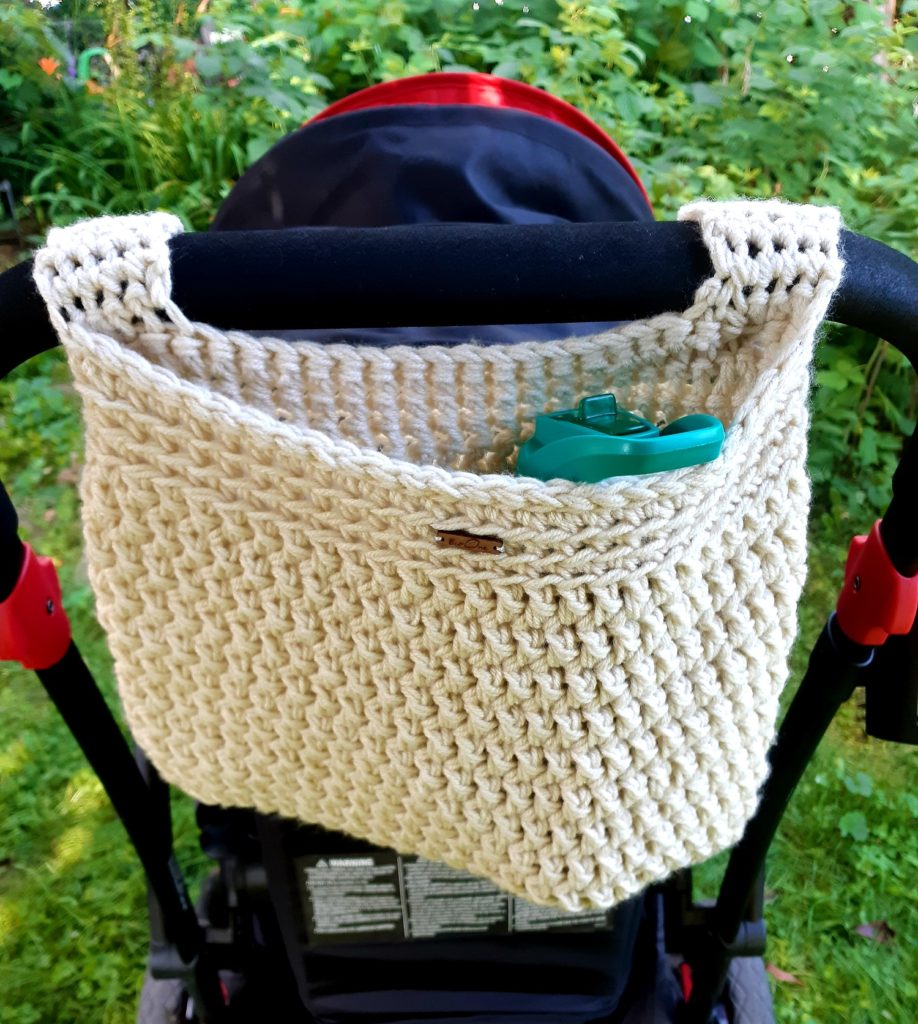
In use on the stroller, it comes in very handy to have my water bottle, wallet and phone at the ready since our stroller only has enough spots for the kids’ water bottles and most strollers don’t necessarily come with a spot to put your phone let-alone your wallet. Then all the bigger bags can live in the stroller basket under the seat, like the diaper bag and our picnic lunches and I don’t have to dig through there to find my things.
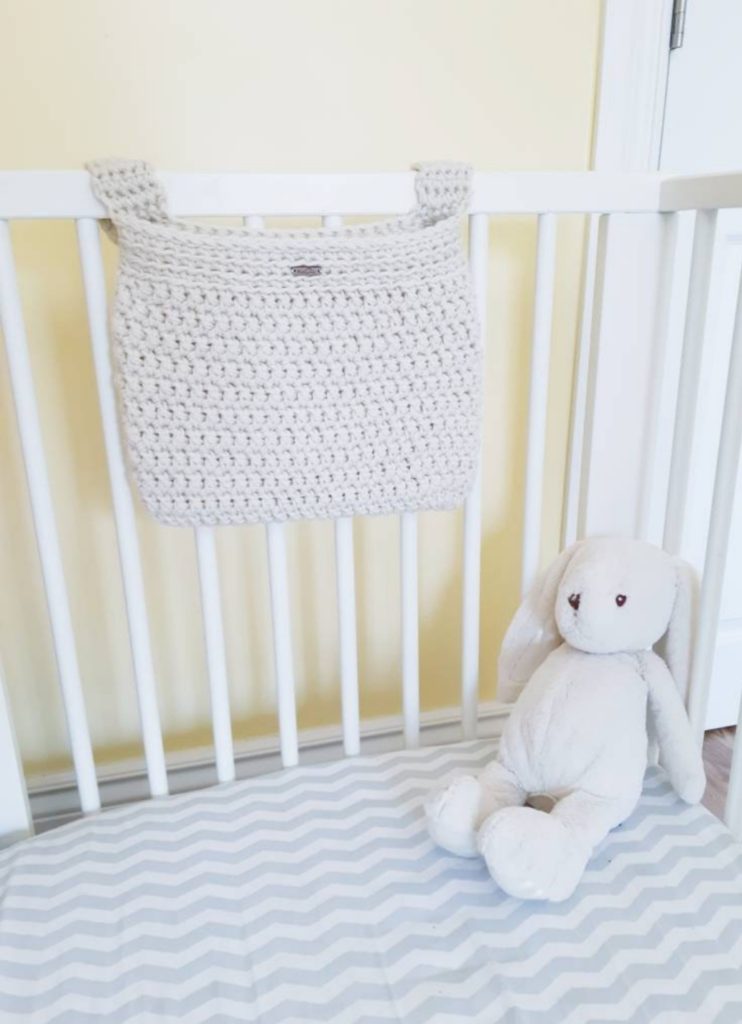
This is a really easy and beginner-friendly crochet stroller pouch and it thick enough to keep things from falling out, but light enough it isn’t too bulky. You can use it on a stroller, a crib or on the arm of your desk chair, the choice is yours!
For more pouches and basket ideas, check out the Crochet Crib Hanging Basket, the Large Crochet Spa Basket or the Belle Bobble Basket.
LET’S GET MAKING! Scroll down for the free pattern below OR you can get the Ad-Free, printable version from my Etsy store HERE
SUPPLY LIST – 8mm hook, Yarn Used: 2 STRANDS TOGETHER of Caron One Pound [4 weight yarn acrylic] in light Light Grey but any 4 ww yarn will work, Approx 400 yards (365 metres), 2 x 1” button, Scissors, Tapestry needle
STITCHES/ABBREVIATIONS – CH – chain, SL ST – slip stitch, DC – double crochet, SC BLO – single crochet in the back loop only
SIZES – N/A
FINISHED MEASUREMENTS – 8” height by 14” width
GAUGE – N/A
DIFFICULTY LEVEL – Beginner
PATTERN & SIZING NOTES –
- This case is made entirely in a spiral working off an oval base around the starting chain (except the tabs)
- The pouch is made holding 2 strands of yarn together for a chunky look
- The tabs can be made to your desired length by adding rows but the pattern tab size will fit around most standard stroller handles
INSTRUCTIONS –
POUCH BODY:
CH 20+1 (you will start Round 1 in the 2nd chain from the hook – do not chain 2 or 3 for this first DC so that the spiral incline blends nicely)
ROUND 1: (52 ST)
– DC 4 in to the first ST
– 1 DC in the next 18 ST
– 8 DC in the last ST (ST 20) to turn the corner
– [Working down the back side of the foundation chain] DC in the next 18 ST
– 4 DC in the last ST (ST 1) – DO NOT join, we begin working in a spiral
ROUND 2: (52 ST)
– 1 DC in to the 1st ST in the 1st Round, mark this stitch as it’s the 1st in your round and keep marking the 1st stitch in each round so you are able to count your rows
ROUNDS 3 to 10: (52 ST)
– 1 DC in each ST around
ROUNDS 11 to 13: (52 ST)
– 1 SC BLO in each stitch around
ROUND 14: (52 ST)
– 1 SL ST in each stitch around
YO and pull through to tie-off and cut your yarn.
TABS:
Determine your “corner” stitches on each side of the pouch and make sure there are 28 stitches in between them on the front side of your pouch (either could be the front, it’s your choice). These will be the outside stitches of each tab. Stitch mark these stitches and your tabs will count in 5 stitches toward the center from these.
**Note: In order to have the “right side” of your rows match up on each tab, you will have to start the tab on the left (when looking at the pouch from the front) from the 5th stitch in and work out toward the corner and you’re working the 1st row from the inside on the front of the pouch. The tab on the right (when looking at the pouch from the front) will start from the corner stitch you marked and work in so that you are working the first row from the outside on the back of the pouch.
For Both Tabs
ROW 1 to 7: SC 5 st, turn
ROW 8: SC 1, chain 3, SC 1, turn
ROW 9: SC 1, SC 6 into the chain space, SC 1
YO and pull through to tie off and cut yarn
Align buttons with the button holes in the position of your choice (mine are about 3 rows down from the top) and sew on with your yarn and a tapestry needle.
Weave in all ends with a tapestry needle to complete.